This project started out as a quote I wanted to share in this season of gratitude and turned into a PicMonkey tutorial! While working on making the pinnable image below for Pinterest, it occurred to me that this could be a teachable moment, too. I think PicMonkey is a great photo editing tool for the novice photographer and even the more advanced photographer can use it with great success. So, I’ve written yet another PicMonkey tutorial for you!
Supplies and Materials List
This post contains affiliate links for your convenience. Click here to read my full disclosure policy. Below is a list of supplies and materials needed to complete this project.
Computer || Printer || Ink for Printer || Paper for Printer or Photo Paper || Frame
Here’s the Thornton Wilder quote I chose to share with readers:
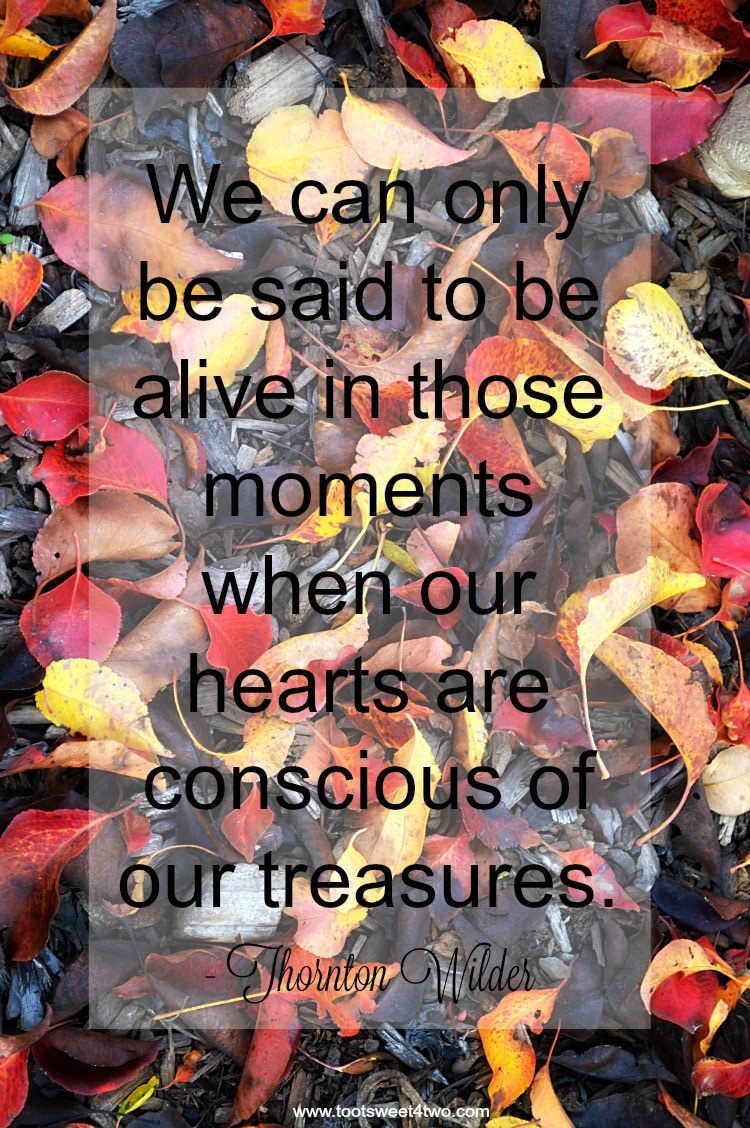
“We can only be said to be alive in those moments when our hearts are conscious of our treasures.” – Thornton Wilder
We can only be said to be alive in those moments when our hearts are conscious of our treasures. - Thornton Wilder. #freeprintables Click To Tweet
With Thanksgiving right around the corner, I looked for quotes about gratitude to share over the next few weeks working up to Thanksgiving Day. But, we have a dilemma in Southern California – a shortage of truly autumn-inspired photo ops.
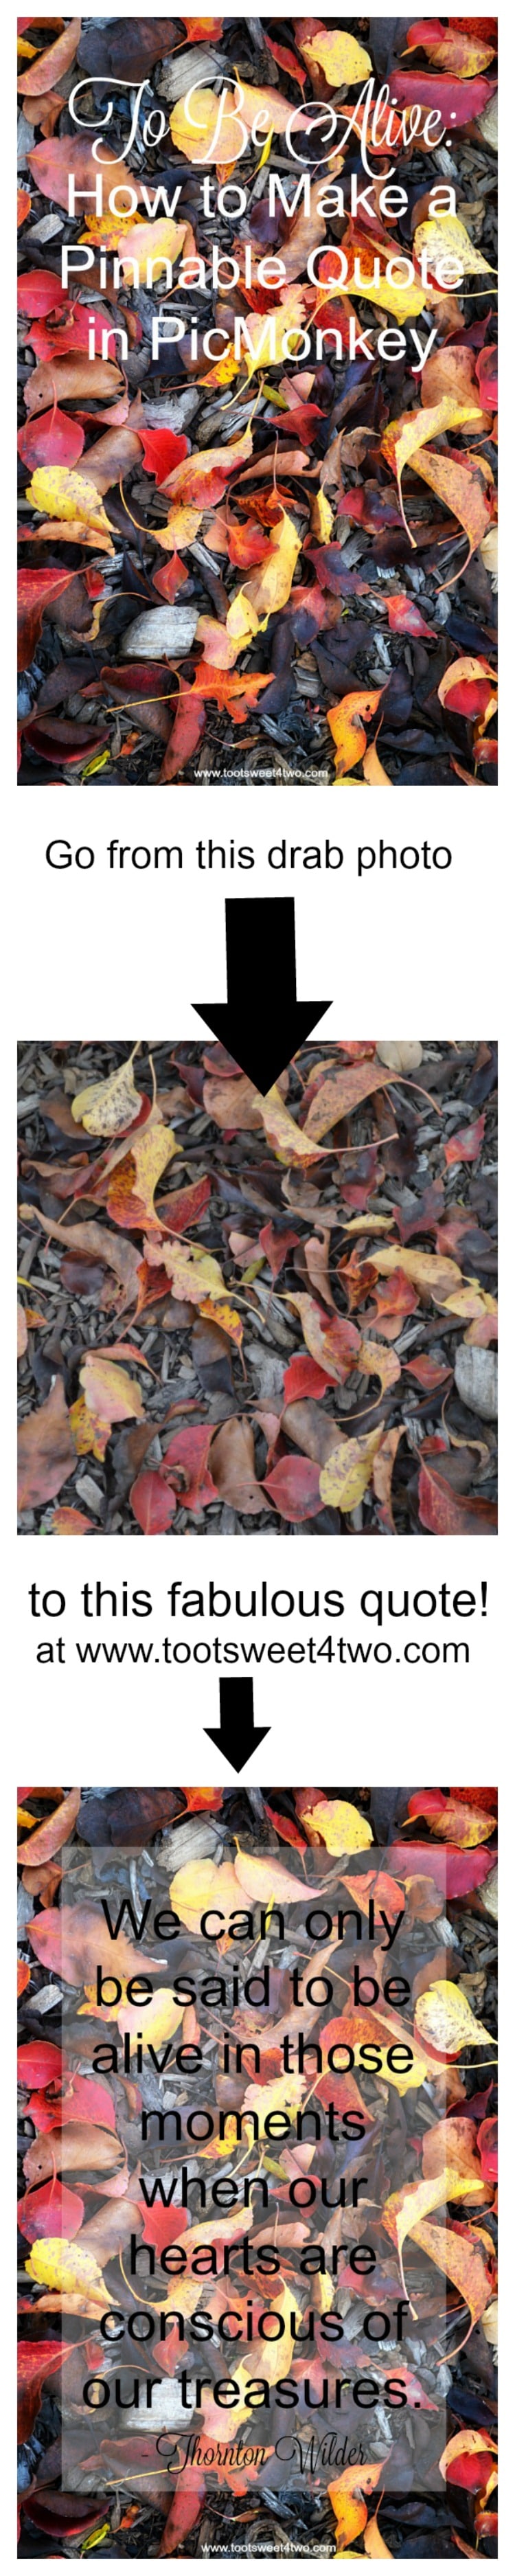
And since I’ve overloaded this blog with pumpkin photos these past few weeks, I decided that I wouldn’t use yet another pumpkin photo for this quote! So, I look through my images to find one representative of fall. And, this is what I found…
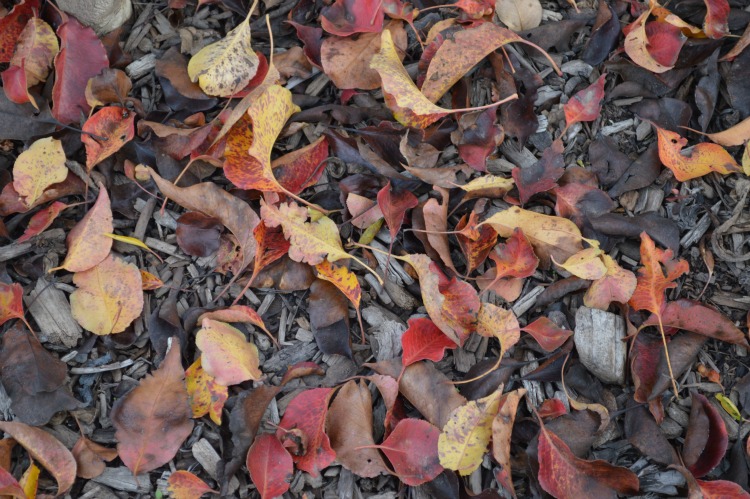
A bunch of dead leaves in fall colors on our mulch! Plus, this picture is horizontal and not the favored vertical for Pinterest. But, I knew with PicMonkey’s help, I could make this photo shine! So, here’s a PicMonkey tutorial on what I did to make a pinnable quote in PicMonkey, just for you!
HOW TO USE “BASIC EDITS” IN PICMONKEY
- Open PicMonkey and choose “Edit an Image” and upload a horizontal photo.
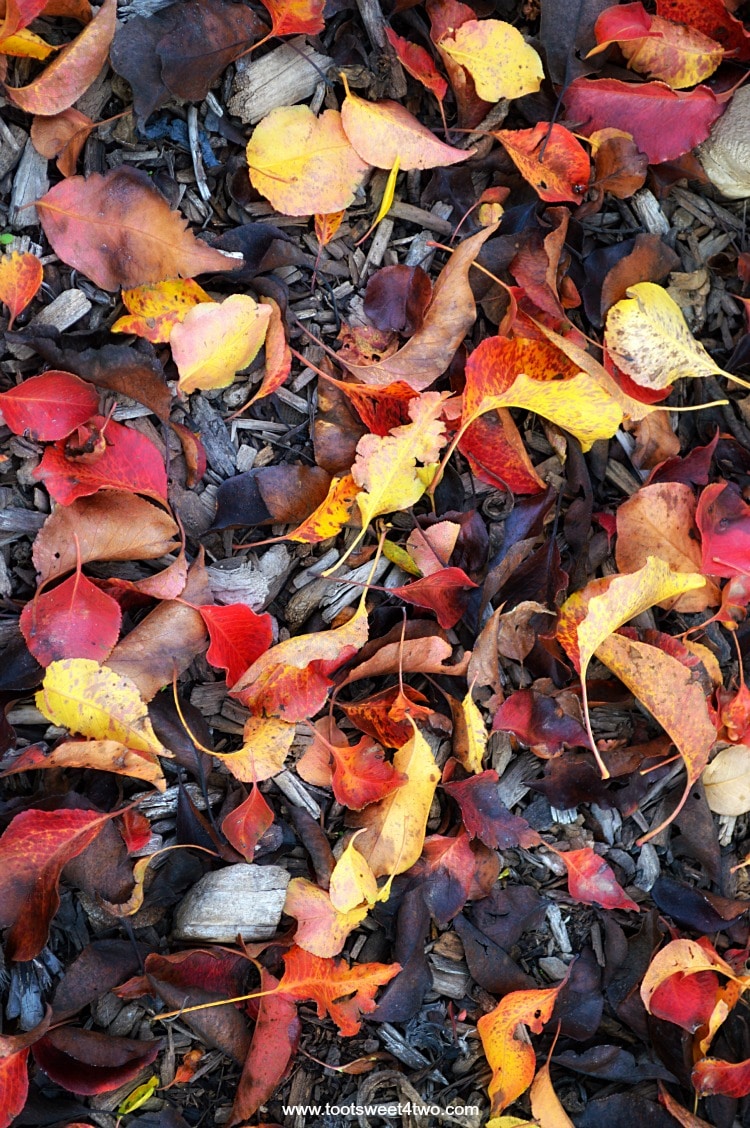
- Under “Basic Edits,” click on “Rotate” and choose which way to rotate your photo to vertical and then click on “Apply.”
- Next, resize your newly made vertical photo to a width you need (750 pixels is the width of my blog by 1128 pixels high). It helps to resize large photos (the original of this one is 6016 x 4000) to a more scaleable size because otherwise PicMonkey is slow to react to your changes and may even lock up!
- Then, choose “Sharpen” and click on “Unsharp Mask.” Using the sliders, I changed the “Radius” to 3.02, the “Strength” to 50% and the “Clarity” to 3% and clicked on “Apply.”
- Next, click on “Exposure”. Again, I used the sliders, moving “Highlights” to 30, “Shadows” to -5 (that’s minus 5) and clicked “Apply.” Please note that sliding “Highlights” and “Shadows” bars will be different for every photo and also will depend on your personal choice.
HOW TO USE “EFFECTS” IN PICMONKEY
- With the “Basic Edits” done, I moved on to “Effects,” which looks like a magic wand on the sidebar menu in PicMonkey.
- Using the right slide bar, I moved down until I found “Burst” and clicked on that. It defaults to 50% and I thought that was perfect. I clicked “Apply.”
- Then, I chose “Orton” and used its default settings of “Bloom” at 50%, “Brightness” at 50% and “Fade” at 30% and clicked “Apply.” My photo went from the drab leaves scattered on the ground in the horizontal photo above to this fabulous vertical photo that screams autumn:
Wow! What a difference! Now I was ready to add my quote to this image to make a pinnable image for Pinterest.
HOW TO USE “OVERLAYS” IN PICMONKEY
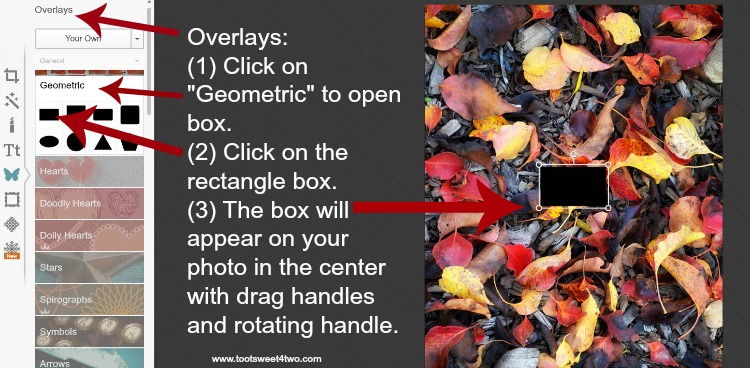
Click on “Overlays,” which is the butterfly on the left sidebar menu. The first overlay choice is “Geometric.” Click on “Geometric” and the box drops-down revealing several choices. I chose the rectangle box because it can be scaled to my needs. The rest of the choices (square, circle, oval, etc.) can only be made larger or smaller, not scaled to your choice. When I clicked on the rectangle box, PicMonkey places the box on your image. Note that the box has both drag handles in every corner, plus a rotating handle at the top of the box.
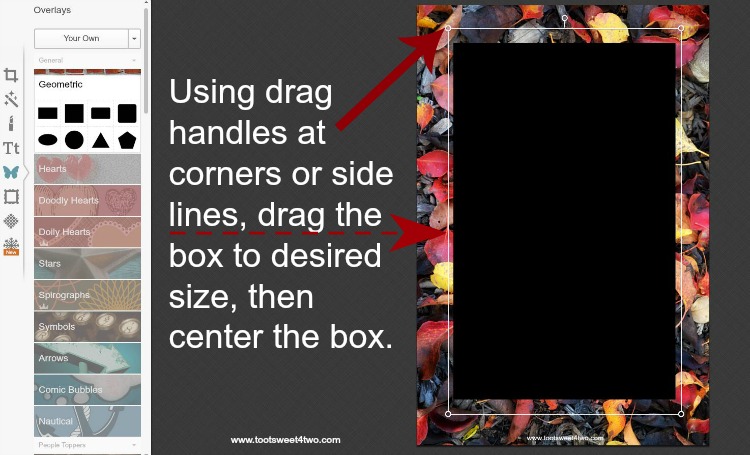
Next, I enlarged the black rectangle. This can be done both by using the drag handles in the corners and the lines around all four sides of the box. I wanted about an inch margin all the way around.
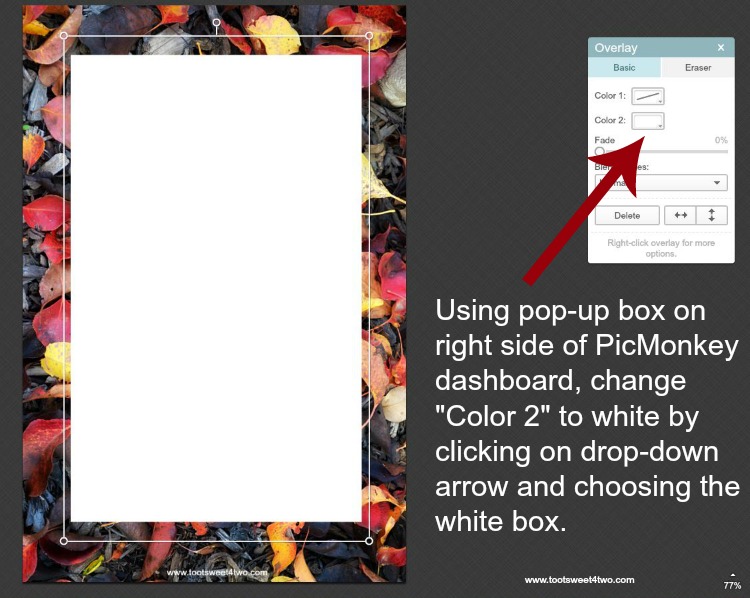
Satisfied with the size of the rectangle, I changed the color to white. A pop-up box appears on the right side of PicMonkey’s dashboard providing additional editing features. To change the color from black to white, I clicked on the drop-down arrow on Color 2 and clicked on the color white.
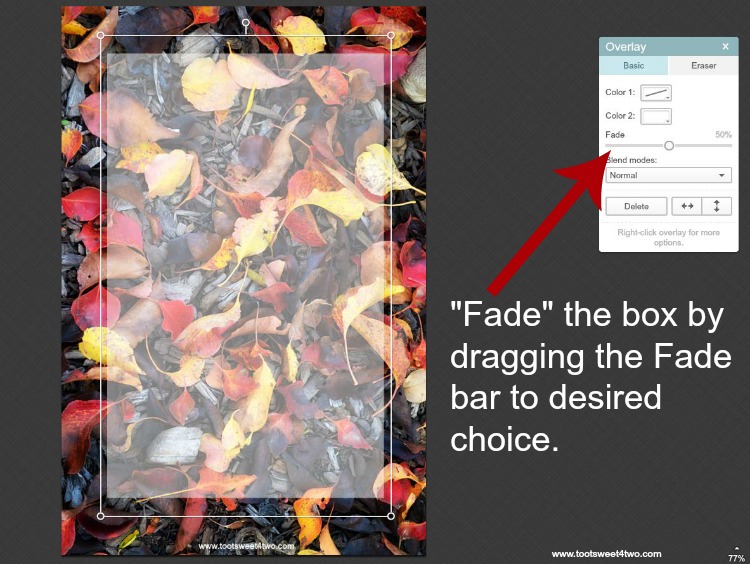
While my leaf-bordered white page now looks like a piece of pretty stationery, I didn’t want that look for my quote. So, I used the “Fade” feature in the “Overlay” pop-up editing box and dragged it right until I reached the desired effect.
HOW TO ADD “TEXT” TO IMAGES IN PICMONKEY
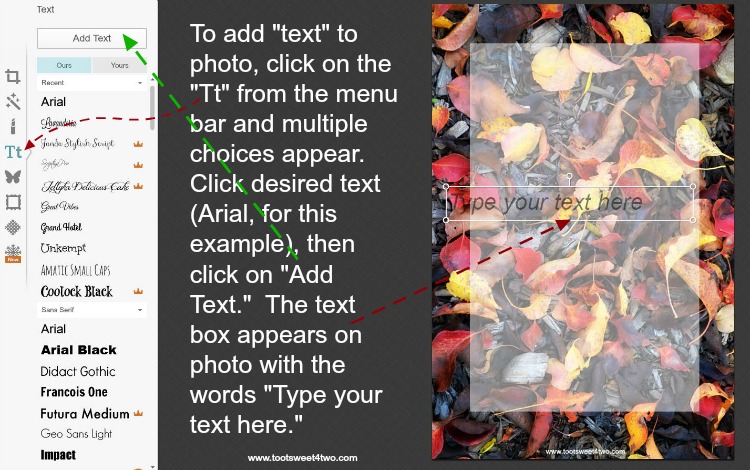
Now, in this part of the PicMonkey tutorial, I’m ready to add my text to the image. To open the “Text” section in PicMonkey, click on the “Tt” in the left sidebar menu. A myriad of choices appear, making it decision time!
I chose to keep the text clean and simple by choosing “Arial” for this example. In order to make the text box appear on your image, click on your choice of font. Then click on “Add Text” at the top of the list of text options. This automatically opens a text box on your image with instructions to “Type your text here.” Insert your cursor in that box.
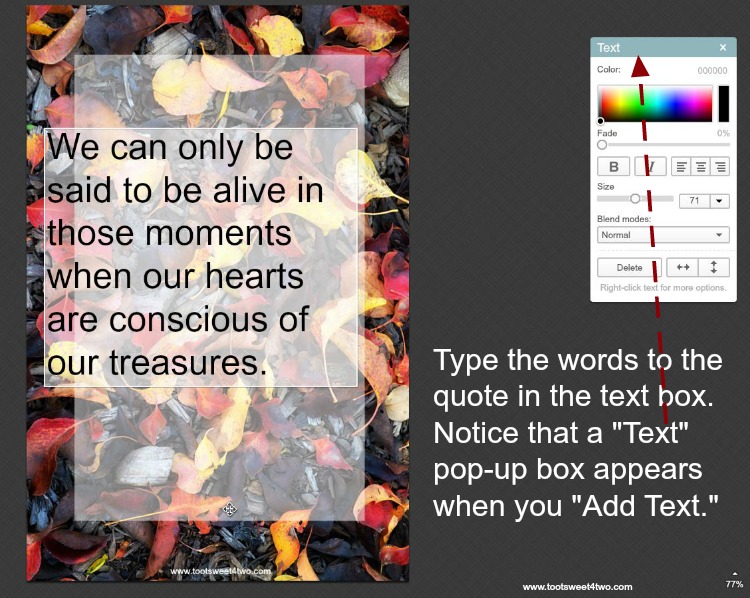
Rather than fiddle with all the options as I type my text, I chose to type my text all at once. Then I’ll come back and resize, center, edit, etc. Once you start typing the text, a “Text” pop-up box appears on the right side of PicMonkey’s dashboard. This “Text” pop-up box gives you more editing options.
Advanced “Text” Editing Techniques in PicMonkey
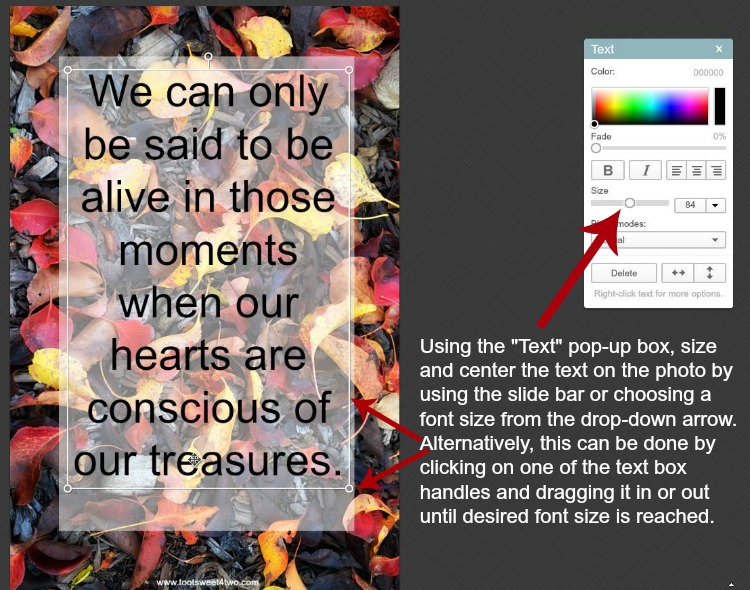
After you type your text, it’s time to edit it for size, color plus centering (or not). Using the “Text” pop-up box, size and center the text on the photo by using the slide bar. Or, choose the font size from the drop-down arrow. Alternatively, this can be done by clicking on one of the text box handles and dragging it in or out until the desired font size is reached.
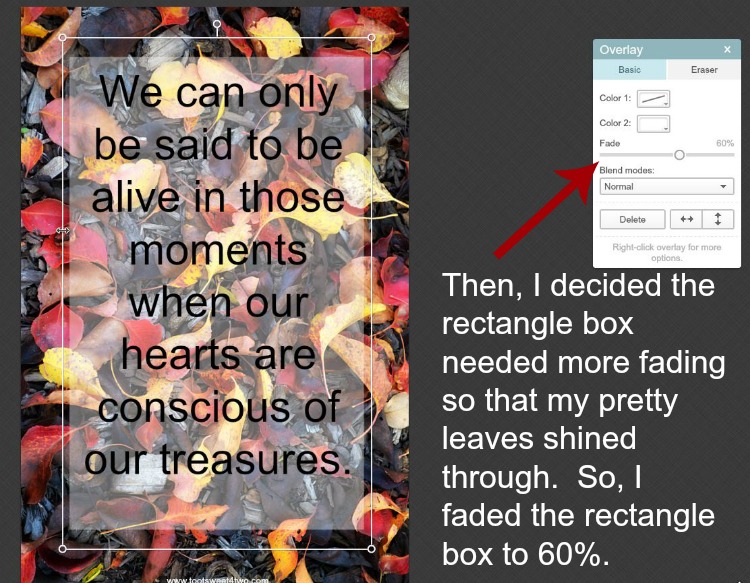
At this point, I decided that my “fade” wasn’t enough on the rectangle box. I want more of the beautiful leaves to shine through! So, I faded it again by dragging the “Fade” bar.
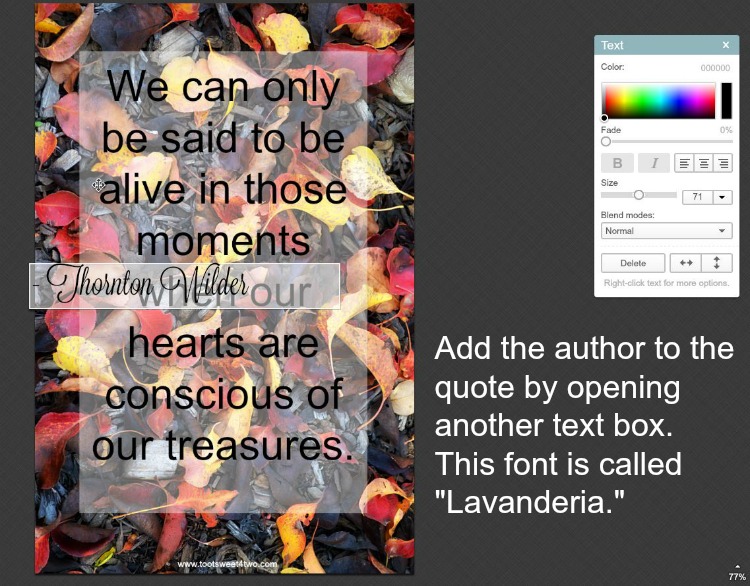
Next, I wanted to add the author to the quote, so I opened another “Text” box. This font is called “Lavanderia.”
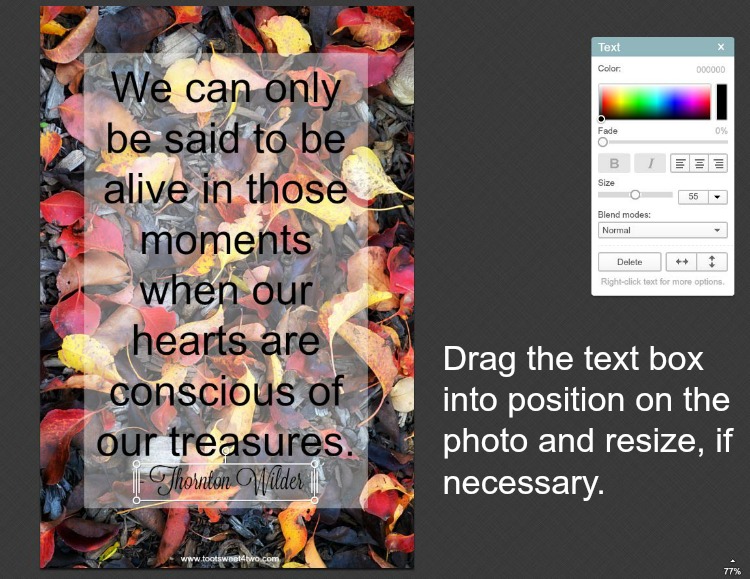
Then dragging the text box into position at the bottom of the quote, I used the handles to resize it.
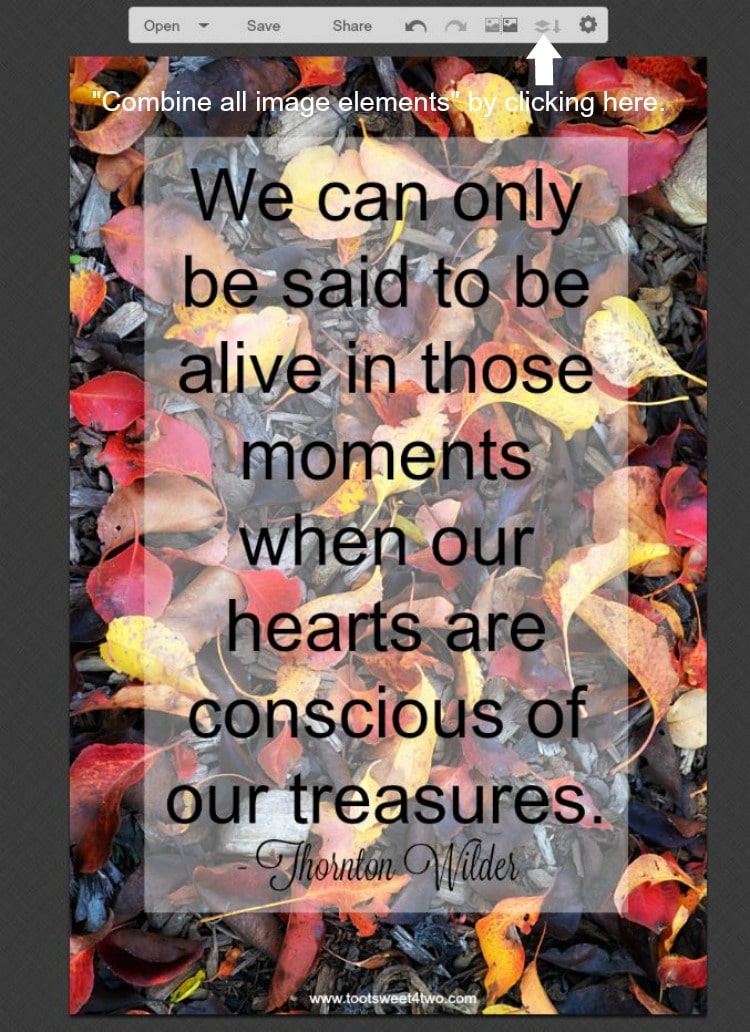
And, I combined the images to the photo by choosing “Combine all image elements” at the top of the dashboard.
How to Save Your Image in PicMonkey
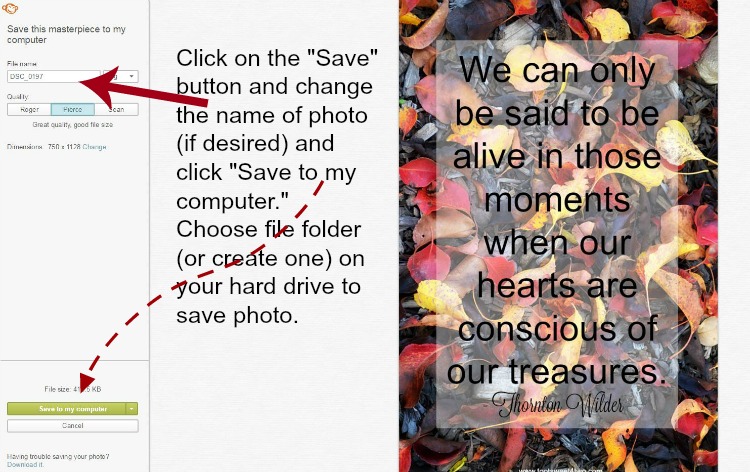
Ready to save my masterpiece, I click on “Save” at the top of the dashboard (see previous image above), which opens this area of the dashboard (above). At this point, you are given an opportunity to name your photo (or not) because it defaults to the name of the image that you uploaded. For Google search engines and SEO (search engine optimization), I always rename the images that I add to my blog. I use very descriptive file names. For example, this one is named “how to save a photo edited in PicMonkey.”
But wait – we’re not done! (I bet you thought we were done with the PicMonkey tutorial!)
Resize Your Image for Printables in PicMonkey

If I’m creating an image that I want to share with readers that is “printable,” i.e., readers can download it and print it on 8 1/2-inch by 11-inch copy paper, I need to resize it yet again so that it prints correctly for readers. So, I resized the photo to 2400 x 3300 pixels, which will print on 8 /12-inch by 11-inch paper.
Be sure to uncheck the “Keep proportions” box. Otherwise it won’t fit. Obviously, this tactic distorts your original photo somewhat. But, for quotes, this distortion is insignificant. Alternatively, you can size and edit your image to 2400 x 3300 pixels first and save it for your printable. Then, you can downsize it to fit the width of your blog and save it again.
How to Print
To create a printable, you need to upload your saved 2400 x 3300 pixel photo (jpg) to a “Word” document. Then center it and save it as a PDF (a tutorial for another day!).
Here’s a link to the printable image, so that you can frame it for the Thanksgiving holiday season: To Be Alive quote printable. Need a frame for this beautiful quote? I’ve got you covered! Check out these options on Amazon: 8 x 10 frames.
Plus, here’s a pinnable collage to pin to your Pinterest board:

Thanks for sharing!
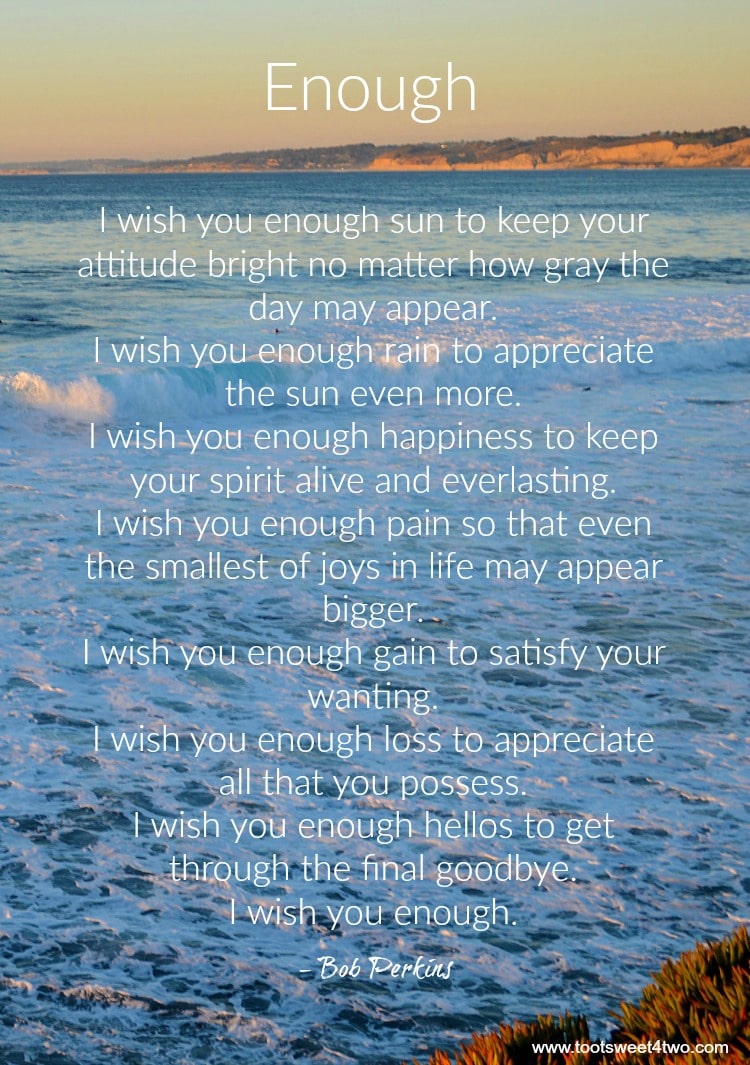
That’s it for the PicMonkey tutorial! Here are a few more pinnable quotes for the Thanksgiving season (all link to a specific post on this blog):


I have many PicMonkey tutorials on my blog. If you want to learn more, just type “PicMonkey” in my search bar and all the PicMonkey tutorials will come up!
Oh, and one more thing: if you think PicMonkey might be too advanced for you to use with success, I taught my 9-year-old great-niece, Princess P, to use it the other day. We made some cute bags for a scavenger hunt that we found on this blog and thought we’d make something similar for a party we are having soon. So, cute out my PicMonkey tutorials and others and in no time flat, you’ll be an expert!
Tootles,
Leave a Reply