Have you met the Monkey? He’s this cute little orange guy with an impish wink. He’s fun, friendly and easy to get to know plus a great resource for bloggers of all genres. If you are new to PicMonkey, now’s your time to get acquainted with this free photo editing site (this post contains affiliate links for your convenience. Click here to read my full disclosure policy.)!
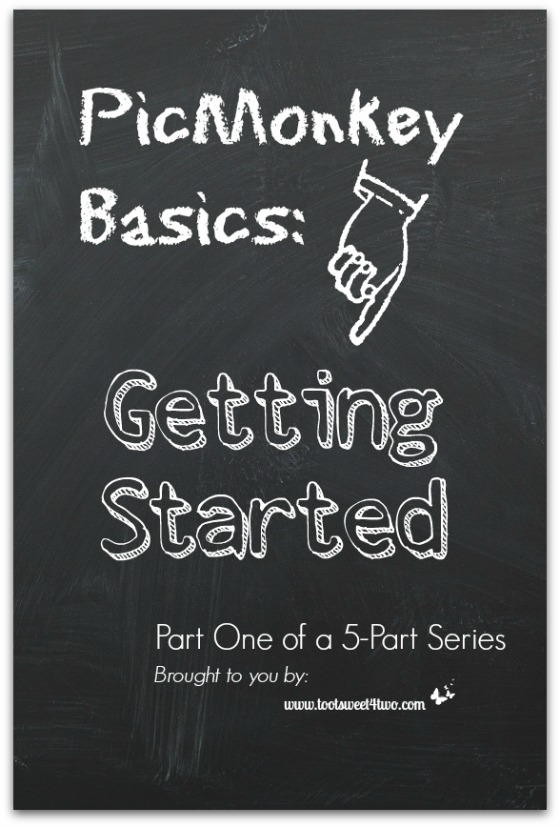
PicMonkey Basics: Getting Started is the first of a 5-part series brought to you by Toot Sweet 4 Two designed to help PicMonkey novices get their feet wet. So, whether you are a blogger or a just someone interested in a simple photo editing site so that you can share photos on social media, PicMonkey is a solution!
I’m preempting my normal post schedule this week to bring readers this 5-part series over the next 5 days. So, let’s get started…
PicMonkey is a free photo editing website, with an optional upgrade, that doesn’t require an account, nor does it require that you download your photos to their site. In fact, you can’t download your photos to their site for permanent storage. Instead, you upload the photo you want to edit from your computer’s hard drive, from Dropbox, Facebook or Flickr. Once you’ve finished editing your photo, you save it to your computer to upload to your blog post, Facebook, Pinterest, Google+, or other social media sites.
The free version of PicMonkey has a myriad of options in every part of the photo editing process. But, by upgrading to “Royale” for a small monthly fee or an even smaller annual fee, the user has access to everything. If you do upgrade, you will need to create an account and then sign in to your account every time you want to use those upgraded features.
So what can a user do on PicMonkey? So many things…
- Make a Facebook cover banner and a Twitter cover image
- Create pinnable images for Pinterest
- Touch-up photos
- Airbrush photos
- Adjust photo exposure
- Sharpen for clarity
- Adjust the color/temperature
- Add overlays, textures, frames
- Make collages
- Add text to your photos with creative fonts
- Add effects with the click of your mouse
- Crop photos for impact
- Rotate, realign
And so much more!
How do you start? Go to PicMonkey. Once on PicMonkey, choose one of the four major functions:
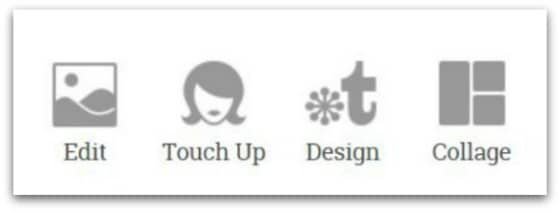
- Edit a Photo
- Touch Up a Photo
- Design Your Own
- Create a Collage
This series will cover each of these basic functions in parts 2 through 5. But, to acclimate you with the choices, let’s take a brief tour of each:
Edit a Photo
![]()
- If you’ve created an account, login.
- To edit a single photo, hover over the Edit a Photo choice.
- A drop-down box will appear that gives you choices to upload your photo from your computer’s hard drive, Dropbox, Facebook, Flickr OR to use one of PicMonkey’s samples.
- Plus, they have some tips for beginners via a tutorial.
Touch Up a Photo
If you want to touch up a head shot photo, the steps are the same:
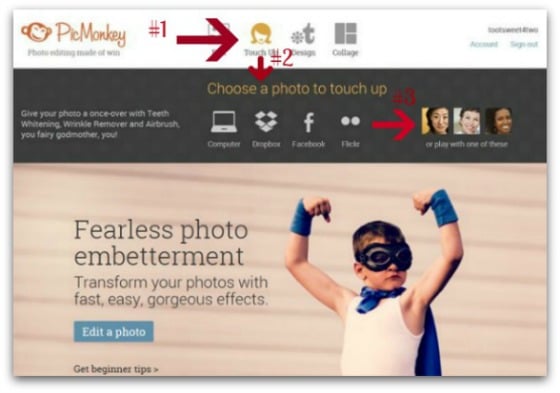
- Hover over Touch Up a Photo
- A drop-down box appears
- Choose your choice of upload
Design Your Own
Creating a graphic (such as an invitation, banner, cards or an introductory graphic for your blog post, as I did with the first photo in this post) from a blank canvas is also one of PicMonkey’s many fun features.

Again, the way to get started is similar:
- Hover over Design Your Own
- A drop-down box appears asking you to choose the size of your canvas
- The “custom” choice allows you to put in your own dimensions
Create a Collage
This choice allows you to create collages with multiple layout choices.

- Hover over Create a Collage
- Choose the photos you want to add to your collage
- Or choose their photos to play around and learn the ropes!
Now that we’ve covered PicMonkey Basics: Getting Started, what’s next? Stay tuned for the rest in this series:
- Part 2 – PicMonkey Basics: Edit a Photo
- Part 3 – PicMonkey Basics: Touch Up a Photo
- Part 4 – PicMonkey Basics: Design Your Own
- Part 5 – PicMonkey Basics: Create a Collage
More fun is just around the corner with the monkey and his shenanigans!
Tootles,

Related Posts:
(other PicMonkey tutorials)
- Call of the Wild
- Here Comes Peter Cottontail – A PicMonkey Tutorial
- How Did You Do That? A PicMonkey Halloween Tutorial
- How to Make Easter Placecards for Your Holiday Table in PicMonkey
- How to Make a Horizontal Photo a Pinterest-friendly Vertical Photo Using PicMonkey
(and, PicMonkey’s gift to you!)
Leave a Reply