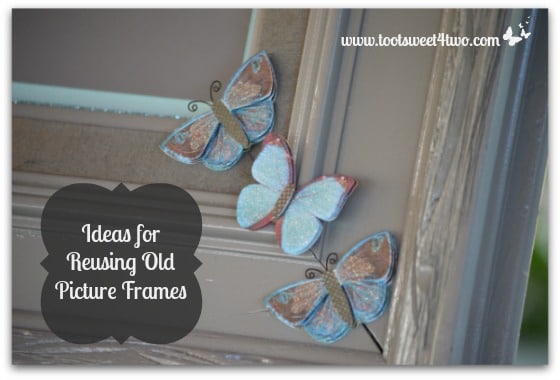
In the spirit of renewing, repurposing or repairing, Ideas for Reusing Old Picture Frames seemed like a good way to make something special without adding more to our landfills. And, since we were having a party to celebrate our Blog-o-versary, I wanted to create special signage for our blog’s name, Toot Sweet 4 Two, that I could display at the party.
Originally, I was going to use wooden letters and numbers that you buy at the craft store and paint them and adhere them to something to create a sign. I was either going to spell out our entire name, Toot Sweet 4 Two, or use just our initials, TS4T – or both. But, my search for wooden numbers became problematic.
Oh, the craft stores had alphabet letters in various sizes, but the number 4 was a problem. In my search, I only found one number 4 and it was hideous and looked terrible and out-of-place with the alphabet letters! What to do? What to do?
Well, we found some old frames in storage and decided to see what we could do to reuse them. They were not ever going to be used in their original state, anyway, because they were kinda ugly. Actually, they were darn ugly. One was a hideous avocado green with golden overtones and the other was just painted brown wood, but it was scarred and worn. Since I had two frames, I decided to make two signs; strictly because I couldn’t decide which one to use!
Here’s what I did for the Toot Sweet for Two sign:
MATERIALS
- Old frame
- Spray paint (I used a gray satin)
- Small chalkboard that fits inside the frame
- Ribbon (I used a blue, almost teal, grosgrain ribbon with a sparkle center)
- Thickers Alphabet and Numbered Stickers (I used a blue)
- Scrapbooking embellishments (I used butterflies)
- Wrapping paper or some other paper to cover the back of the frame (I used silver gift wrapping paper)
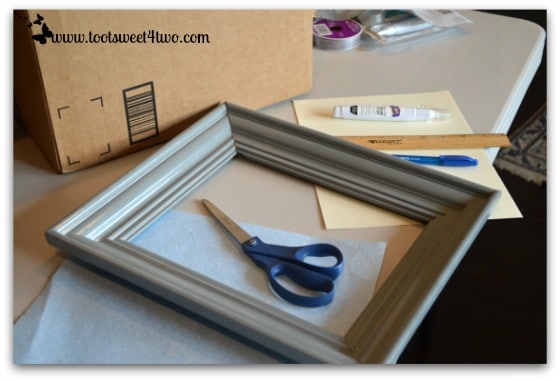
SUPPLIES
- A work surface to spray paint the frame
- Scissors
- Ruler
- Glue (I used Alene’s Clear Gel Tacky Glue pen)
- Double-stick tape

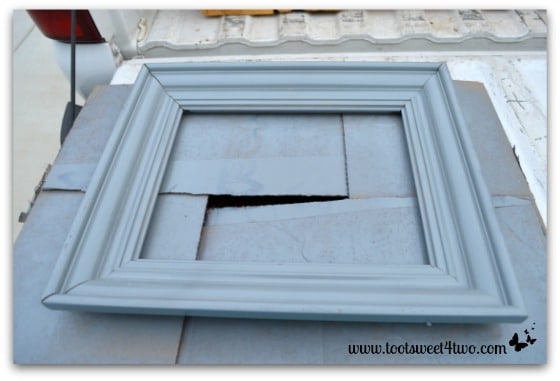
Spray paint old frame
Set up an area outdoors to spray paint your frame. I enlisted my husband, Charlie, for this task. He’s retired and I’ve gotta keep him busy {grin}. He decided to use a leaf/yard waste collection container that we have lying around. It’s light-weight and collapsible and just the perfect height for Charlie, who uses a mobility scooter full-time. The above frame was the green and gold frame I described above (sorry, I forgot to take a “before” picture!) and it had a built-in mat that was permanently attached. So, mat and frame got 3 coats of gray satin spray paint.
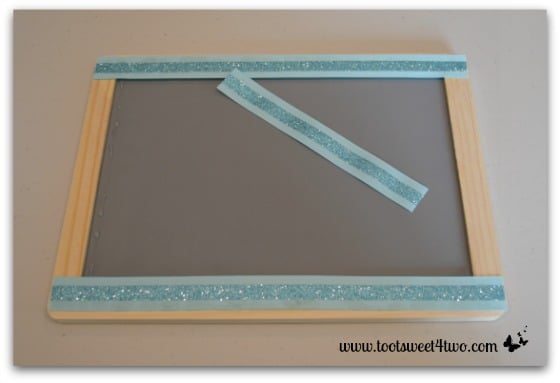
Glue ribbon to chalkboard
While the frame was drying, I decided to work on the picture. I’d purchased a small chalkboard at the craft store, but the chalkboard’s border was permanently attached! We didn’t have the tools to try to cut the frame off (remember the fire?). Anyway, it wouldn’t fit in the opening of the frame that Charlie had just painted, so I came up with Plan B! I had leftover ribbon from my How to Make Paper Napkins Special project and decided to create a border around the chalkboard frame. I had to attach the ribbon in this fashion so that the chalkboard frame wouldn’t show in the picture frame (since it wouldn’t lay flush inside the picture frame). I cut the ribbon to size and glued a piece around all 4 sides.

Ribbon glued to chalkboard
To fit properly in the picture frame, I had to glue two pieces of the ribbon to the chalkboard frame and two pieces of ribbon directly on the chalkboard.
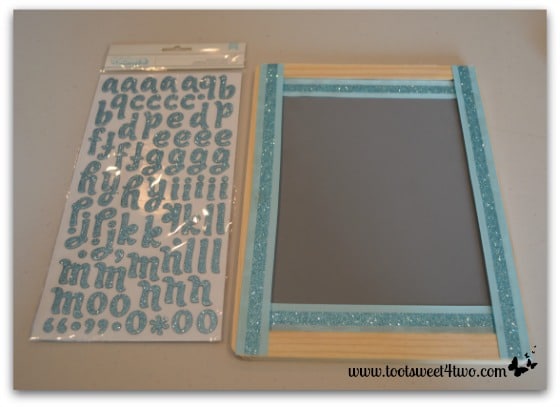
Package of Thickers next to chalkboard
I found the “Thickers” stickers at the craft store in the scrapbooking section. They were perfect! They were light blue, sparkly and had not only alphabet letters but numbers, too! Woohoo!
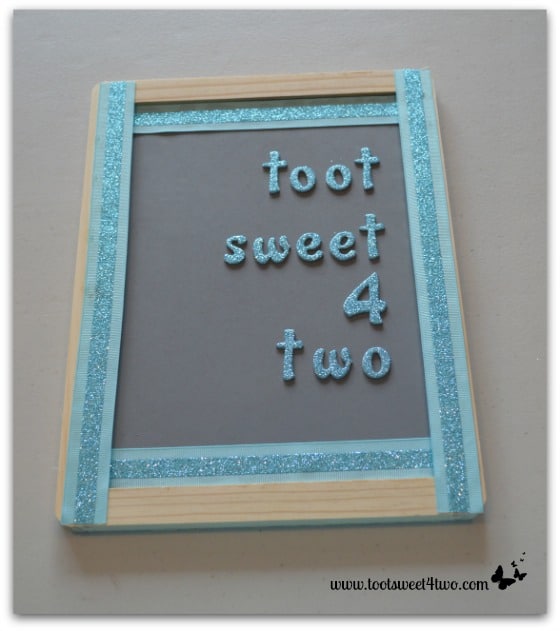
Thickers adhered to chalkboard
I decided to put our name flush right with one part of our name on each line. While these were “tacky” stickers because they are scrapbooking stickers, I did apply them with the Alene’s tacky glue.
Adhere picture to frame
Then, I adhered the chalkboard picture to the frame. This was a bit tricky to get it to line up. Originally I tried taping it with clear packing tape, but that didn’t work. So, I use Alene’s tacky glue again and it worked perfectly!
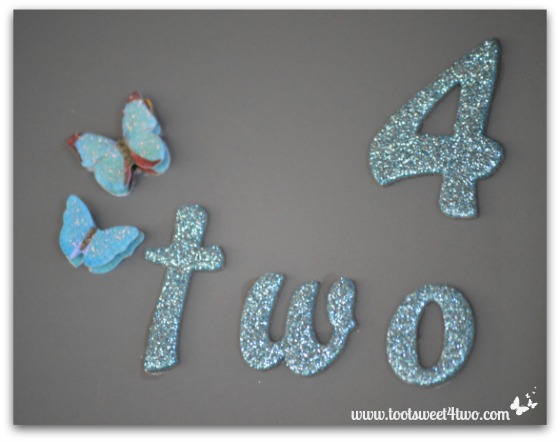
Add 2 butterflies to 4 two
Well, I wanted to add butterflies to our name. After all, the French version of “toot sweet” translates to “in all haste” and butterflies flutter around hastily! I use butterflies when putting our name on our photographs and we consider them part of our “brand.” I adhered them with Alene’s tacky glue, too.
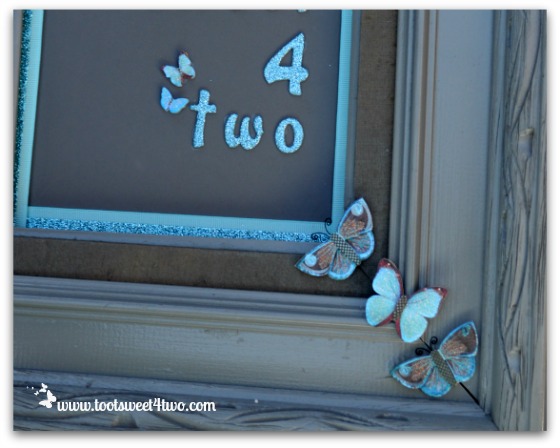
Adhere butterfly stickers to frame
I loved these three-dimensional scrapbooking butterflies so much, I decided to add some to the frame! Again, I applied Alene’s tacky glue to make sure they stuck!
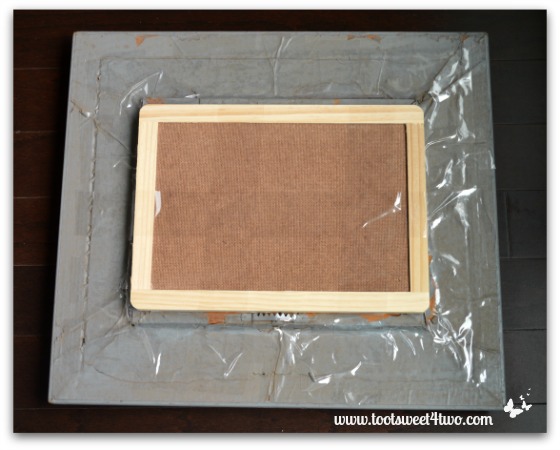
Center chalkboard on frame
Now it was time to finish the back side of this picture! See the mess above? The old frame was peeling its old backing, so I used clear packing tape and taped it up so that I wouldn’t have bits and pieces of old stuff flying off the frame!
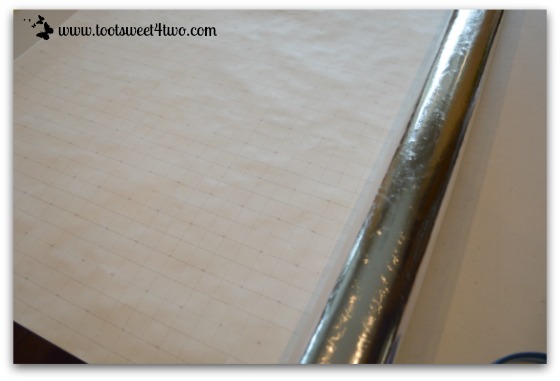
Silver wrapping paper with cutting grid
Then I found a huge roll of silver gift wrapping paper in the closet. It even had a grid on the back. So, after measuring the back of the frame and compensating for the chalkboard sticking out the back, I cut it to size.
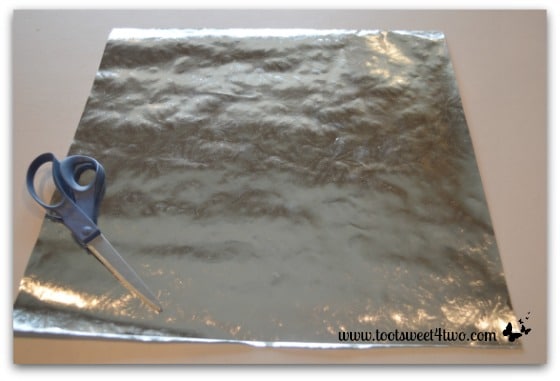
Silver wrapping paper cut to size
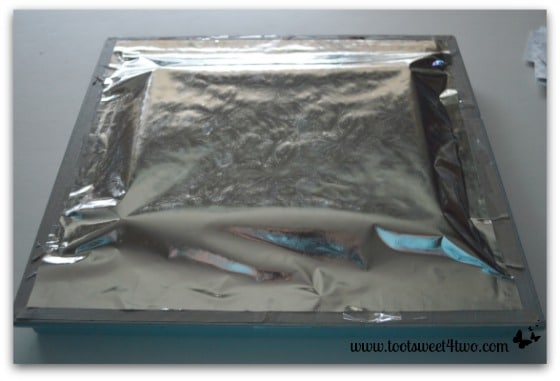
Adhere silver wrapping paper to back of frame
Then I applied the silver gift wrapping paper to the back of the frame with double-sided tape!
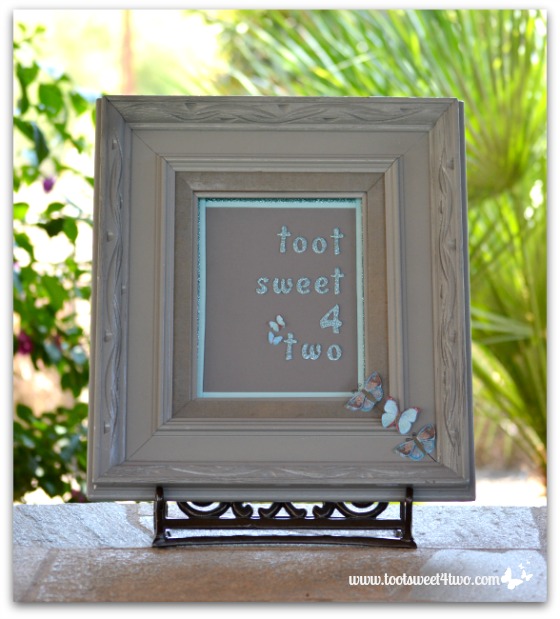
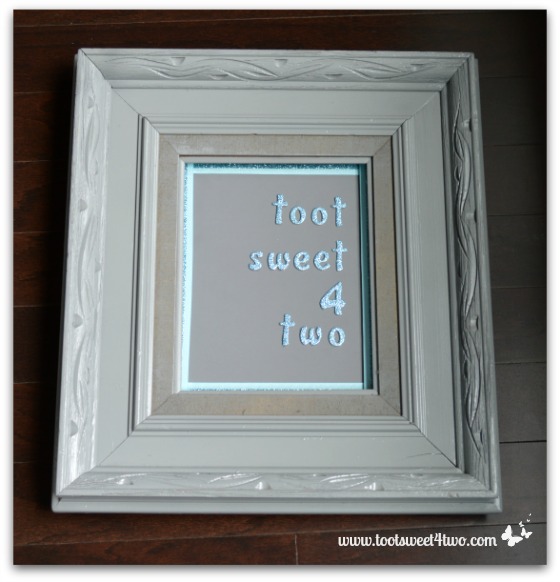
Finished Toot Sweet picture
Voila! Pretty finished picture ready for the party!
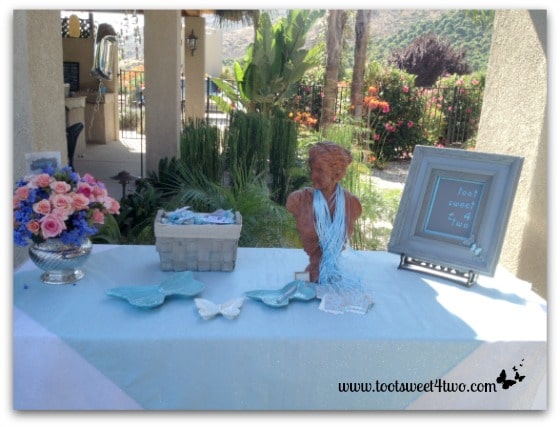
Toot Sweet picture on party table
Here it is on the table with the Cute and Easy Party Name Tags and the Easy Party Favors Featuring You!
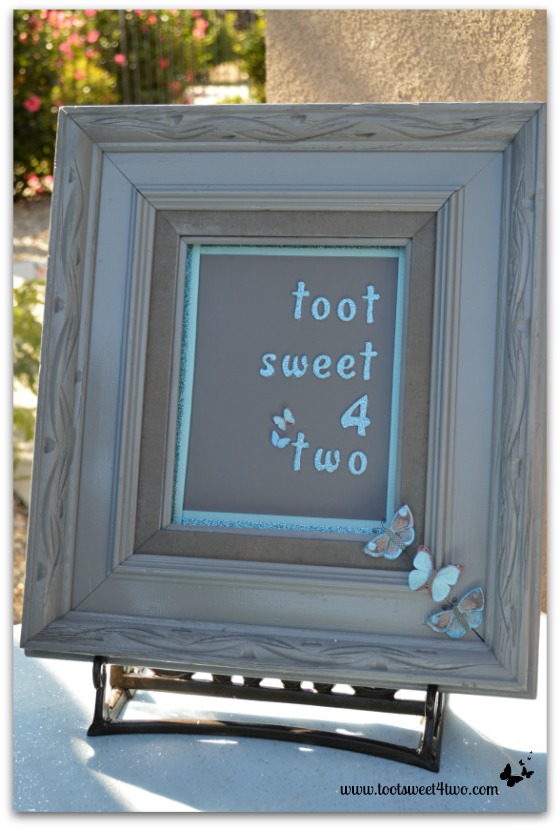
Finished frame on display
Here’s a close-up of the frame and picture on our party table. Thanks, Dawn, for the photo! I was so busy at the party that I didn’t take enough pictures! My sister, Dawn, and Tiffany’s dad, Joel, took a few and shared them with me!
Okay, on to the next picture!
Here’s what I did for the 2 Girls with an Idea sign:
If you don’t know about 2 Girls with an Idea, now your opportunity! Click on the link here: 2 Girls with an Idea.
MATERIALS
- Old frame
- Spray paint (I used a gray satin)
- Cardboard (I used a packing box that I had in the garage from a recent delivery from Amazon)
- One piece of cardstock – 8 1/2″ x 11″ – in either white or cream
- One piece of scrapbook paper of your choice for the background
- Ribbon (I used blue with a lace border)
- Thickers Alphabet and Numbered Stickers (I used a blue)
- Scrapbooking embellishments (I used butterflies)
- Wrapping paper or some other paper to cover the back of the frame (I used silver gift wrapping paper)
SUPPLIES
- A work surface to spray paint the frame
- Scissors
- Ruler
- Glue (I used Alene’s Clear Gel Tacky Glue pen)
- Double-stick tape
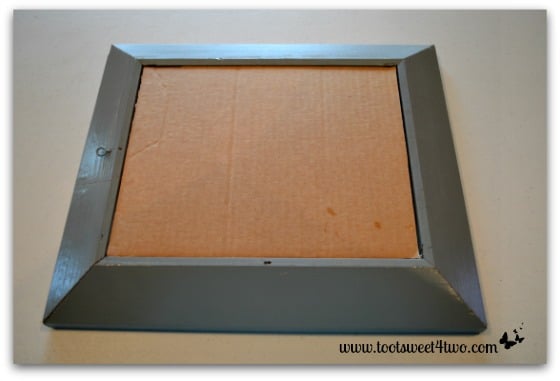
Old picture frame painted gray
This time, Charlie put the old frame on a cardboard box that he put on the tailgate of his old pickup truck. Don’t ask me why! That’s just what he did {grin}. Whatever you use as your surface, it needs to be outside AND you don’t care that it gets paint on it. This frame, too, took 3 coats of paint.
Work surface and supplies for old frames
Once the frame is dry, gather the rest of your supplies on a work table. I have a plastic folding table with metal legs that I use for projects. I don’t have a separate craft room and our garage is either too hot in the summer or too cold in the winter (it’s not insulated).
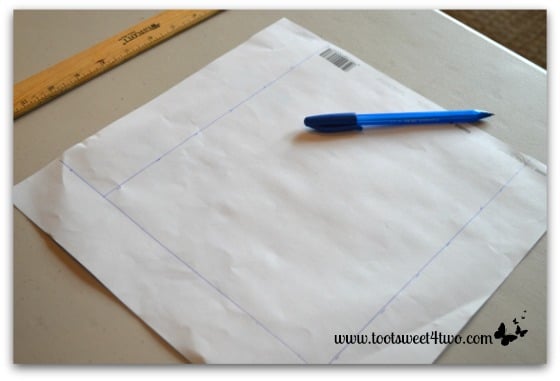
Measure scrapbook paper
I measured the inside of the frame and then cut my box, cardstock and scrapbooking paper to size. This is a piece of 12″ x 12″ scrapbook paper that got wrinkled on the trip home from the craft store. I just measured around the wrinkles!
Glue ribbon around edges of picture
Glue the scrapbooking paper to the cardstock. I did this because I didn’t want the cardboard box to bleed through or to show through the cardstock. Then, trim your ribbon and glue to the edges of the picture. I mitered the corners of the ribbon this time. Then, glue your Thickers into place. Again, I placed the words, one to a row, flush right. Finally, glue on your butterflies. I know it looks wrinkly in the picture above, but once the glue dries, the paper flattens out.
Insert picture into frame
Once the picture dries, place it in the frame. Since this frame has no glass, I actually glued it to the inside of the frame to hold the paper inside. Plus, I glued the cardboard box to the inside edge of the frame so that there was no chance of it falling apart!
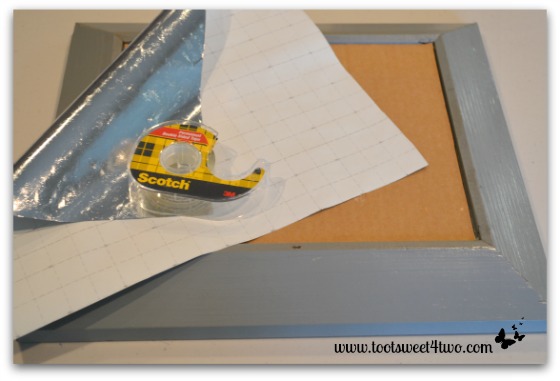
Adhere backing to frame
Lastly, I measured the silver gift wrapping paper and cut it to size. Then, using the double-stick tape, I taped it to the frame to give the back a “finished” look.
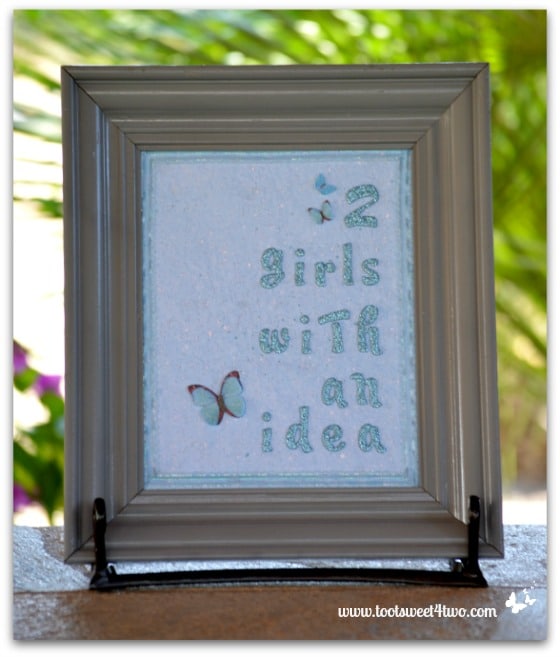
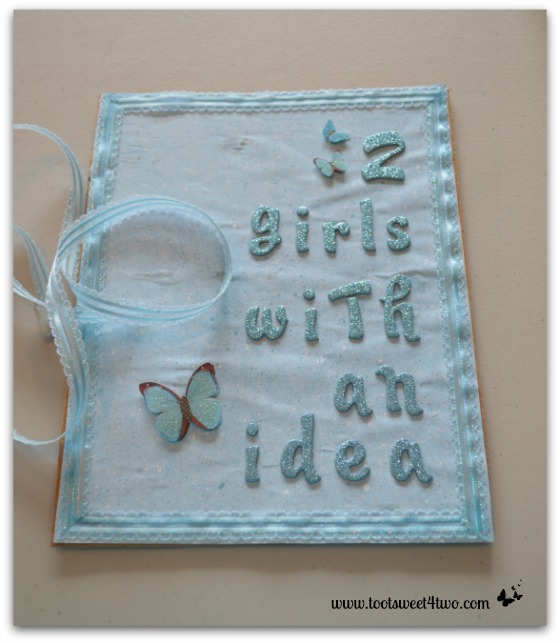
2 Girls picture in old frame complete
Beautiful picture ready to display at the party!
Spoiler Alert! Bonus content!
Here are NEW frames that I painted! Well, actually, Charlie did {grin}!
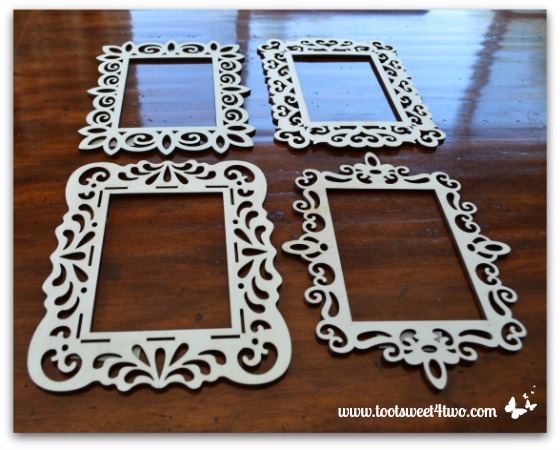
Laser-cut frames
I got these four laser-cut frames at the craft store. They were only $3.99 each.
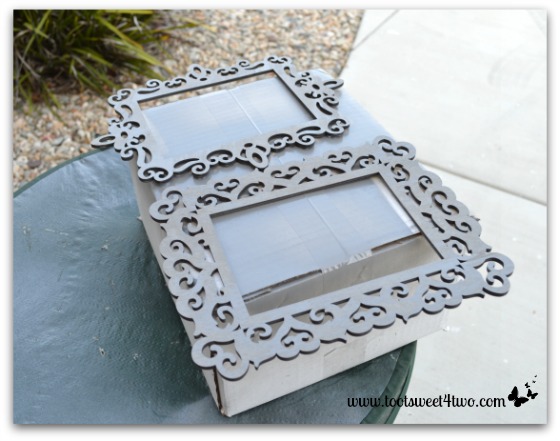
Spray paint laser-cut frames
Charlie sprayed them for me.
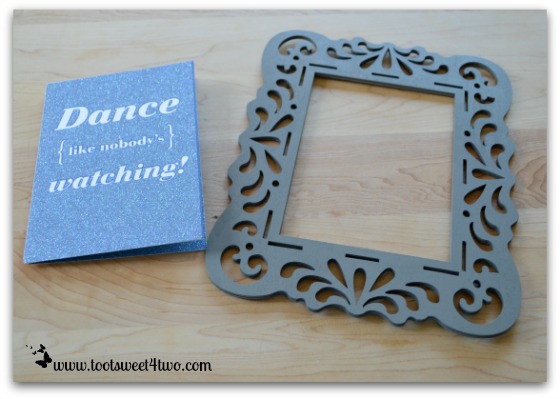
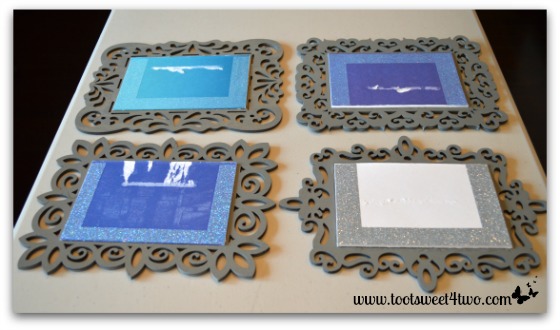
Dance card and laser frame
I bought 4 sparkly greeting cards at Target, also for $3.99 each. We thought they fit the “theme” of our party, plus they were the right colors – blue and gray!
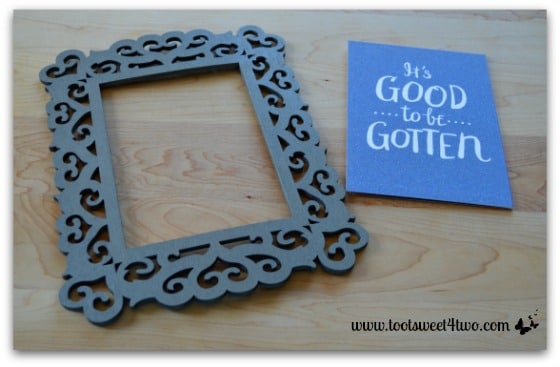
Good to be Gotten card and laser frame
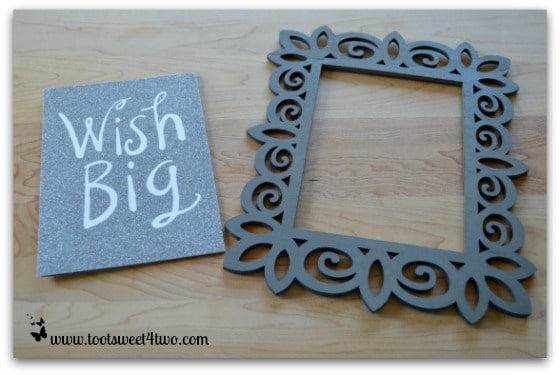
Wish Big card and laser frame
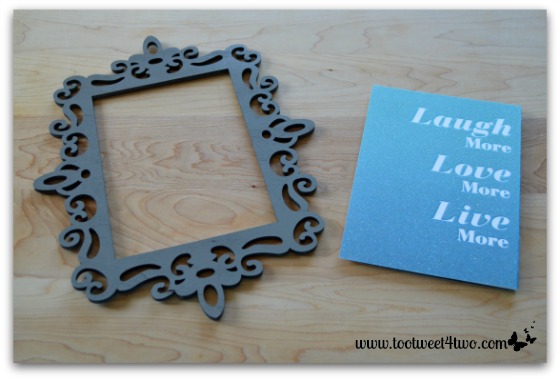
Laugh, Love, Live card and laser frame
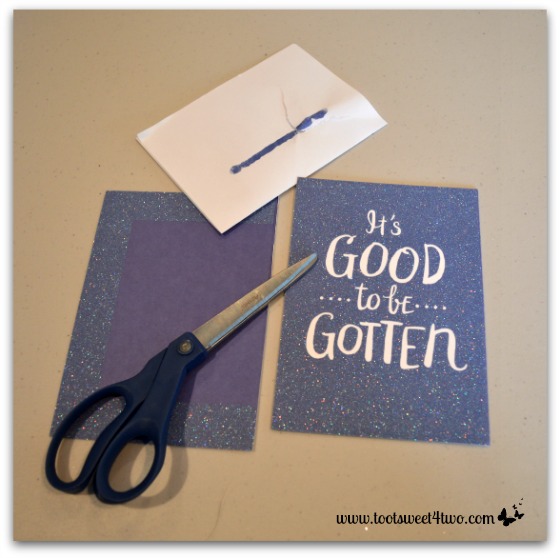
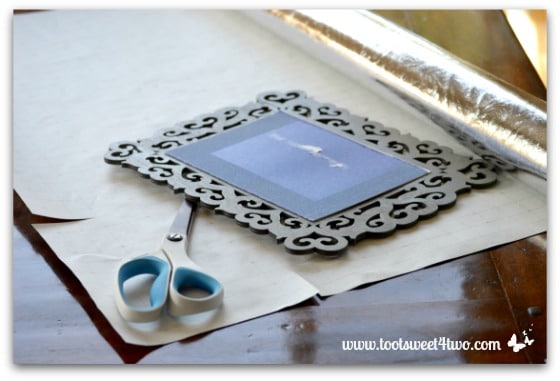
Cut the greeting card apart
Cut the back of the greeting card off at the crease. If it has paper inside, too, remove it.
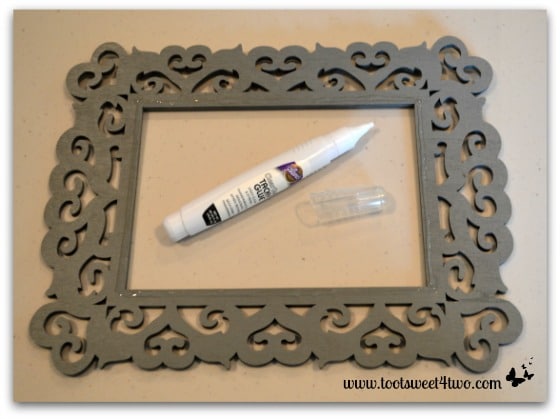
Apply tacky glue to frame
These frames have such a little area for the glue, so a glue pen works really well!
Adhere greeting cards to frames
Once you have glued the greeting cards to the frames, allow them to dry completely before going to the next step.
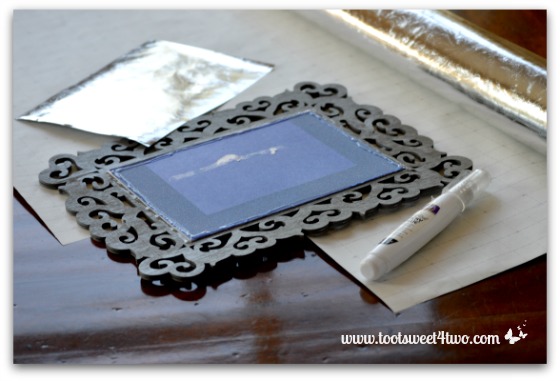
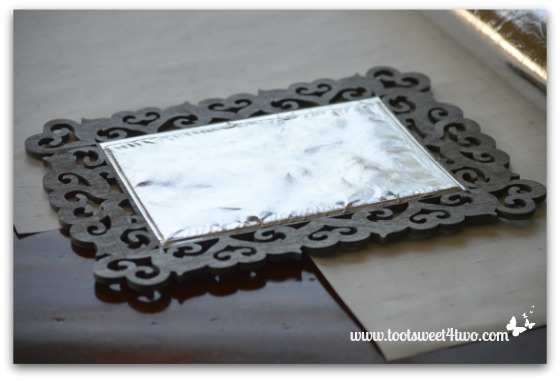
Cut out silver wrapping paper to fit back of laser frame
I used the same silver gift wrapping paper for the backs. I had to glue them twice to get the glue to stick to the glitter!
Put glue around edge of laser frame
Again, using a glue pen works really well for this application!
Adhere wrapping paper to back of laser frame
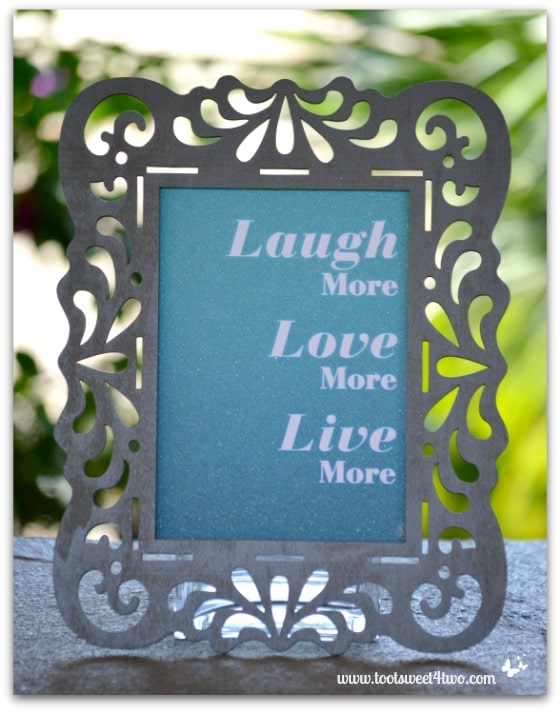
Laugh Love Live card in finished frame
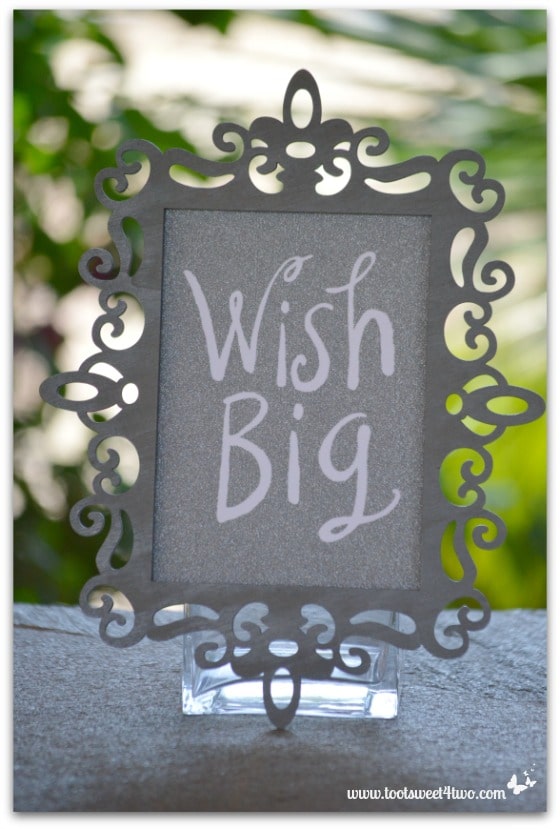
Wish Big card in laser frame
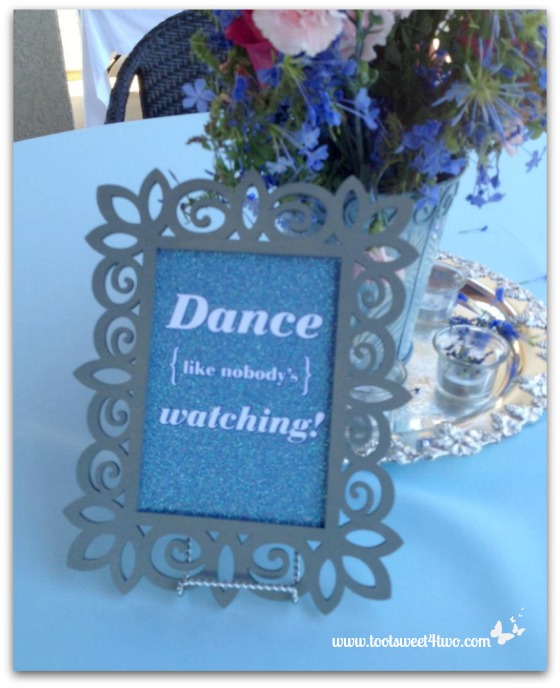
Dance picture on a party table
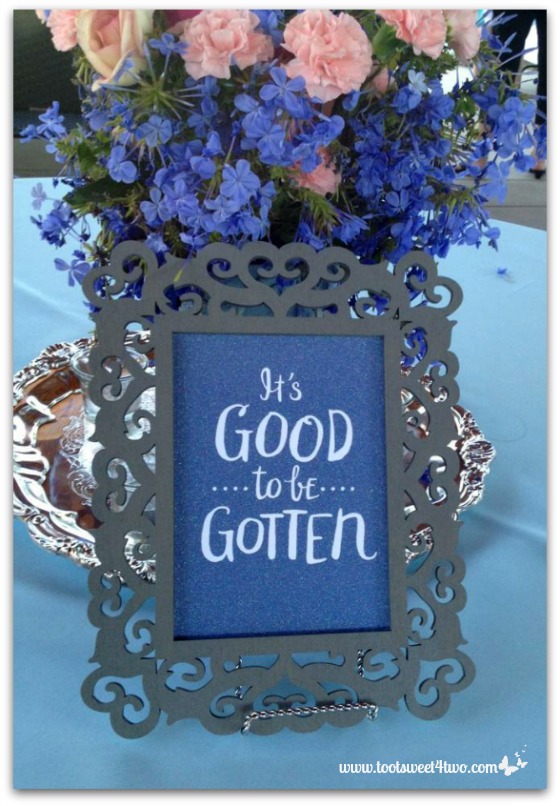
Good to be Gotten picture on party table
What do you think? Beautiful, right? And, fun! Yes, I actually enjoyed making these! And, they were a hit at the party! This would be a good project, too, to do for a kid’s room. How about Disney cards in the laser frames or a favorite Super Hero for a boy’s room? The possibilities are endless…
Tootles,

Related Posts:
(other Blog-o-versary crafting posts)
Can you advise which craft store you found these laser cut frames at? I have seen them at Michaels but they only have one design for each size available. I need more design options.
Hi, Delaney:
Yes, I got them I Michael’s. The Michael’s I went to had these four designs and no more. Maybe you can ask your Michael’s to check other nearby stores and see if they stock all four? If so, maybe they can ship from one Michael’s to the next? Worth a try…hope this helps! And, thanks for visiting our blog!
I did an almost identical one a few months back – yours turned out just gorgeous!
Thanks so much! I had fun making it!