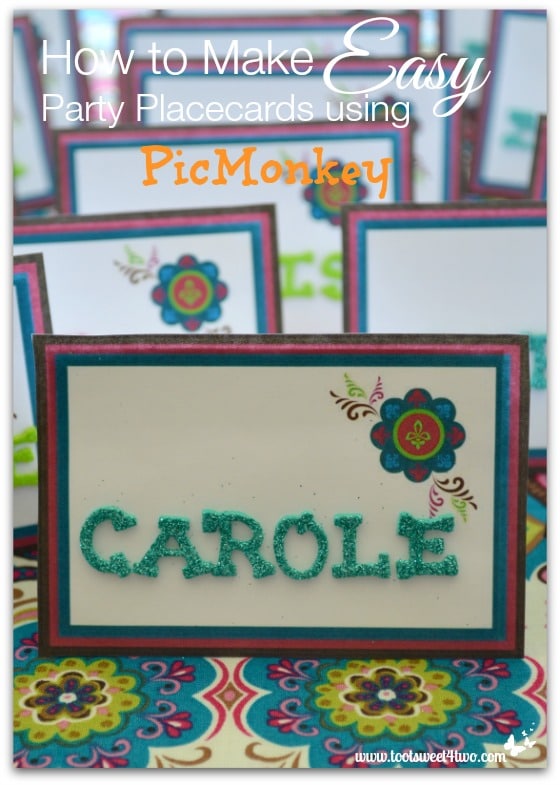
How to Make Easy Party Placecards using PicMonkey has a boat load of photos! 48 of them to be exact! But, don’t leave just yet! This is a super easy project that doesn’t take long to do and allows you to “craft” placecards to match your table decor’ if you can’t find what you want already pre-made.
In addition, this post teaches several different concepts:
- Creative thinking – identifying a problem and constructing a creative solution
- Other uses for PicMonkey other than photo editing
- Using a few basic tools in Microsoft Word to create multiples
- Plus, using materials you have on-hand to finish the project
My hope is by sharing these concepts with readers, the next time you have a problem finding exactly what you want, you will put on your creative thinking cap and figure out something to make it happen!
We were having a birthday celebration for my 84-year-old mother, Jo, and her twin sister, Geri. Well, one likes pink (Jo) and one likes blue (Geri). So, I was trying to make it special for both by coming up with a tablescape that would combine their favorite colors. I found this beautiful paisley-type fabric and decided peacocks were the theme!
But, I couldn’t find stickers in the scrapbooking area of the craft store that would fit my theme. I did find sparkly letters in fuchsia pink, turquoise blue and lime green that were perfect (they matched the fabric) and cheap, so I decided I would use those for my place cards. But, what could I do to make them even more unique?
Check out these two posts for more ideas from this party:
- A Peacock Tale: Decorating the Table for a Special Celebration
- How to Make an Easy No Sew Tablerunner
I’ve done this many times – created something because I couldn’t find what I wanted. For more inspiration, check out these earlier posts:
- Cute and Easy Halloween Candy Packets
- Cute and Easy Party Name Tags
- Easy and Creative Tabletop Signs for Your Next Party
- Easy Party Favors Featuring You!
- How to Make Easter Placecards for Your Holiday Table in PicMonkey
- How to Make Paper Napkins Special
- Ideas for Reusing Old Picture Frames
- Tea Light Tutorial: Adding Edible Sprinkle for a Bit of Sparkle
I decided, for this project, that I wanted to use my sparkly letters, so I wanted the background of my placecard to remain white. But, I also wanted to incorporate some of the fabric’s beautiful colors. I chose the fuchsia and teal (for obvious reasons – the twins) and then decided to use the “grounding” color of a deep chocolate brown. And, I was hopeful that I could figure out something to “jazz it up” since I couldn’t find peacock stickers. Maybe I would try to recreate a pattern similar to the paisley-type design of the fabric?
Anywhoo, I turned to PicMonkey because designing in PicMonkey is easy so learning how to make easy party placecards using PicMonkey is just that – easy!
So, here we go, step-by-step:
Open PicMonkey and do the following:
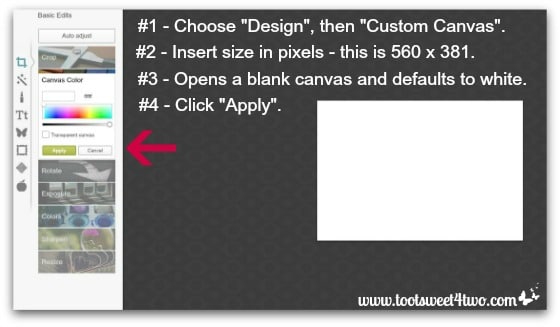
- From the home page, hover over “Design”. A drop-down appears that gives you multiple sizes of canvas. Choose “Custom Canvas”.
- Insert a size in pixels. It doesn’t really matter what you choose (it defaults to a square – 2,000 x 2,000), because you can edit it, too. I chose 560 x 381 because the width of my blog’s margins are 565.
- Once you’ve chosen your canvas size, PicMonkey opens the dashboard and places your white canvas front and center. It opens “Canvas Color” automatically under “Basic Edits”. This is your chance to choose the color of your canvas.
- I wanted my canvas to remain the default white, so I clicked “Apply”.
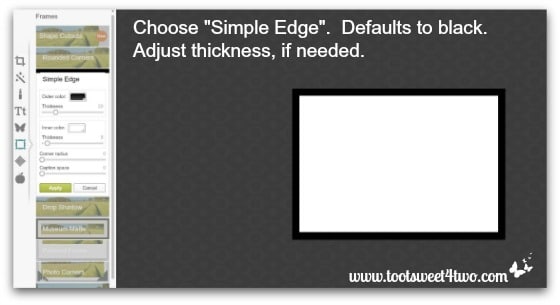
Click on “Frames” and choose “Simple Edge”. The default is black. Adjust the “thickness” of your frame, if needed.
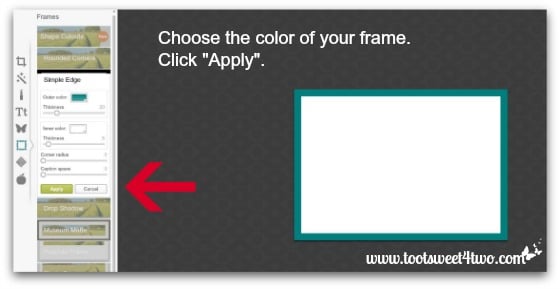
Choose a color for your frame and click “Apply”.

Add another frame. Remember that I decided, during my “creative thinking process” {grin} to use fuchsia, teal and chocolate. So, I need to “frame” the “frame”!
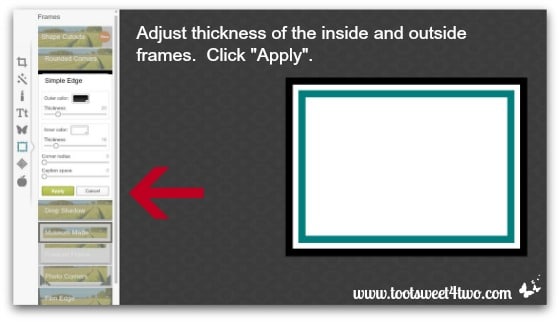
Adjust the thickness of both the inside and outside of the frame. If you are satisfied with the results and want to do nothing more to the frame, click “Apply”.
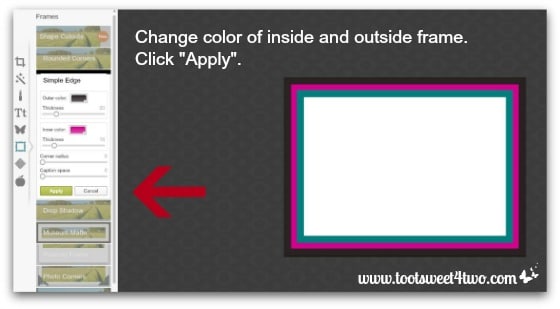
However, I wanted to change both colors of the second frame, so I selected a deep chocolate brown and fuchsia, then clicked “Apply”.
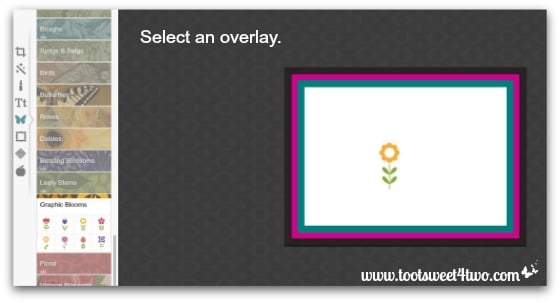
PicMonkey doesn’t (yet) have a peacock and the birds they have in the “Overlays” area weren’t going to work for my project. So, instead, I decided to attempt to emulate the fabric pattern using a flower overlay (that creative thinking process again {grin}).
The flower I decided would be closest to what I was attempting to accomplish was in the “Graphic Blossoms” section of “Overlays”. But, it has a stem. I selected it anyway and PicMonkey loaded on my placecard.
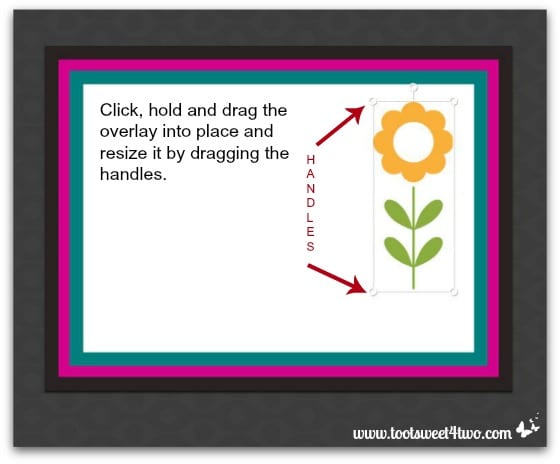
I clicked on it, held it and dragged it to the right hand side of my placecard. Using the handles, I made it larger by dragging one handle.
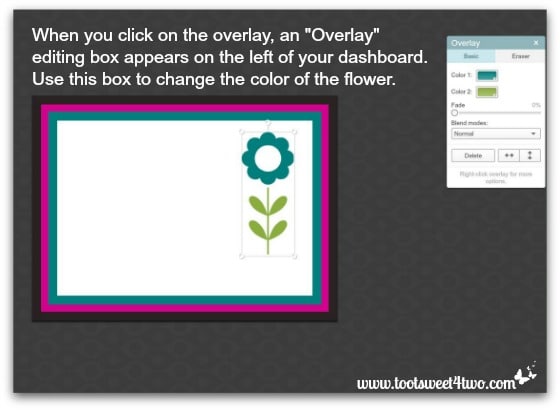
When you click on your overlay, an “Overlay” editing box appears on the far right side of your dashboard. Sorry, but I don’t know my left from my right and my photo above is wrong! I was getting “punchy” creating all these graphics! The editing box appears on the RIGHT of the dashboard {grin}. The yellow flower color was not what I wanted for my flower, so I chose a teal.
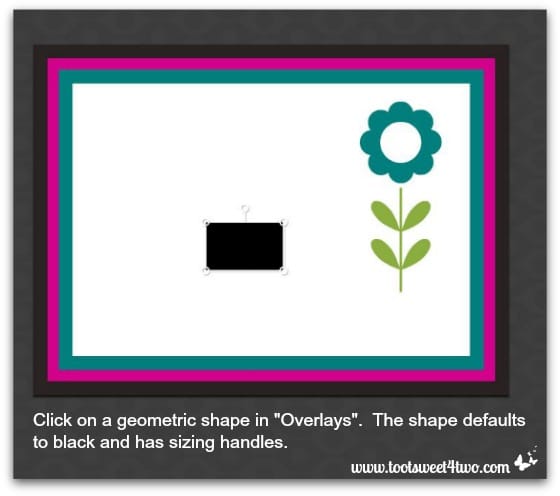
I could have left the flower “as is”, but I didn’t want the stem because I wanted something a little more whimsical. So, I clicked on a rectangle geometric shape in “Overlays”. The shape defaults to black and has sizing handles.
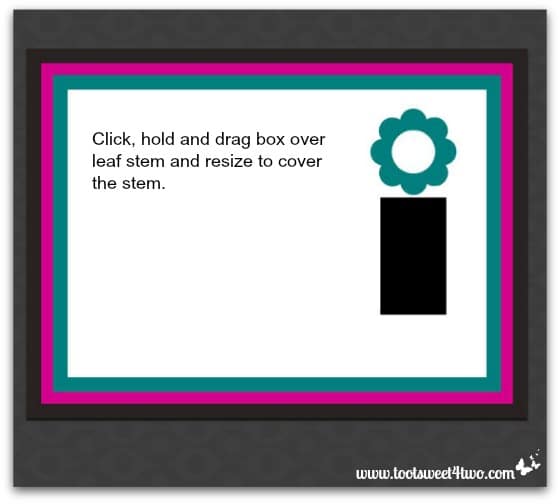
By clicking on the rectangle, holding it and dragging it, I positioned it over the stem and using the sizing handles, made it larger until the stem was no longer visible.
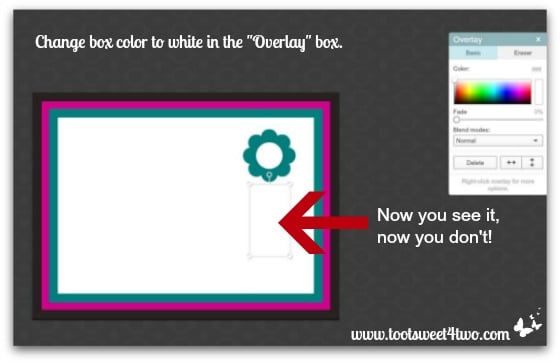
Then, I changed the black box to a white box.
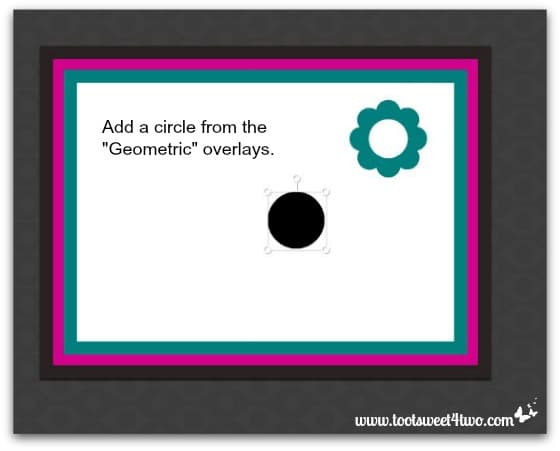
Now I wanted the center of the flower to be something other than white. So, I selected a circle from the “Geometric” overlays and the default is black.
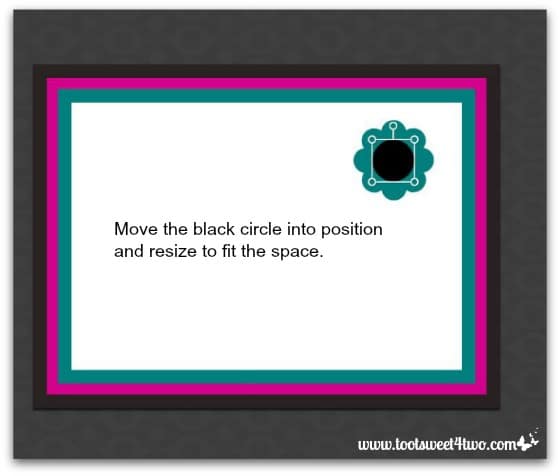
I moved the circle into position and resized it using the handles.
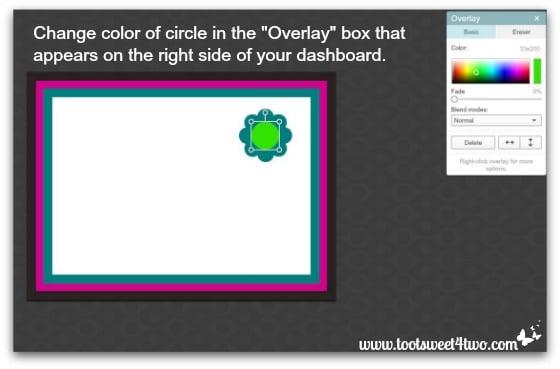
I decided to bring in some of the lime green color from the fabric, so made this circle lime green.

But, I didn’t want the entire circle lime green, so I added another circle.
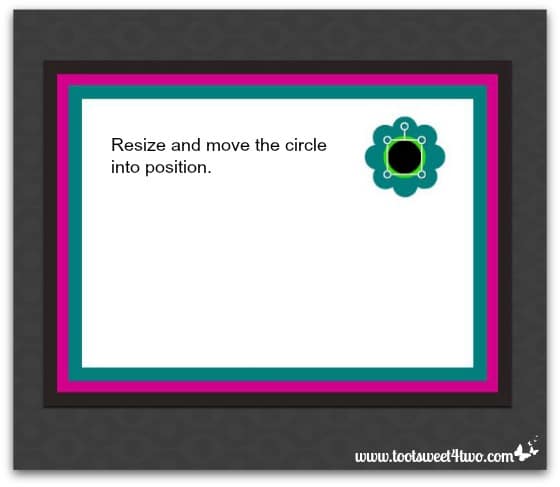
I dragged it into position and resized it so that just a lime green border was visible.
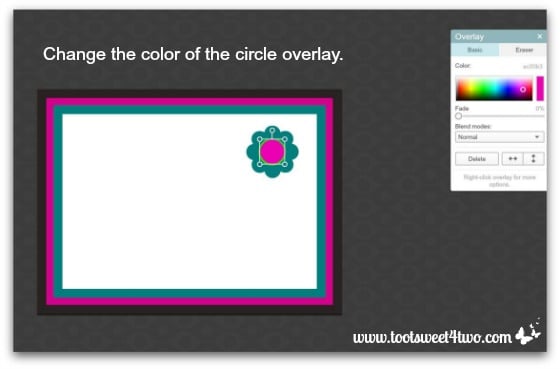
Then, I changed the color to fuchsia.

But, it was still too plain for me! So, looking through overlays again, I decided to add a Fleur De Lis from “Garnishes”. I clicked on it and it appeared on my placecard.

I changed the color to lime green.
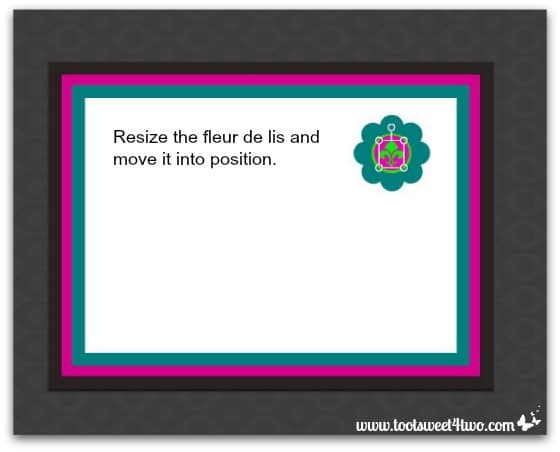
I resized it and moved it into position in the center of the flower.
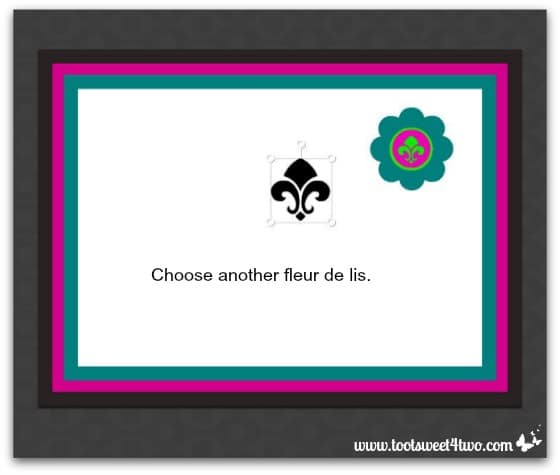
Then, I chose another fleur de lis.
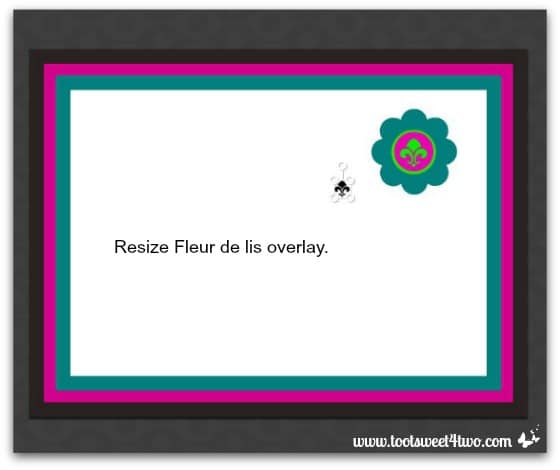
I resized it.
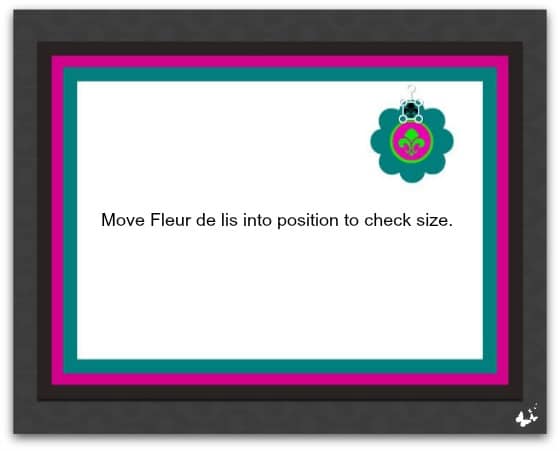
I moved it into position to check the size.
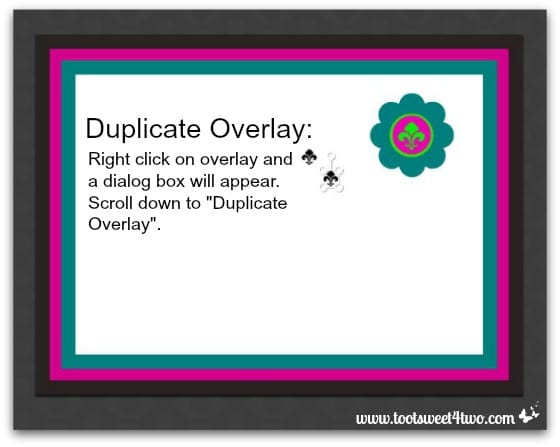
Happy with the size, I moved it back into the white area of my placecard (for ease of viewing), then right clicked on it. When you right click on an overlay, a drop-down dialog box appears with many choices. I wanted to “duplicate overlay,” so I chose that. Now I have two fleur de lis overlays that are the same size.
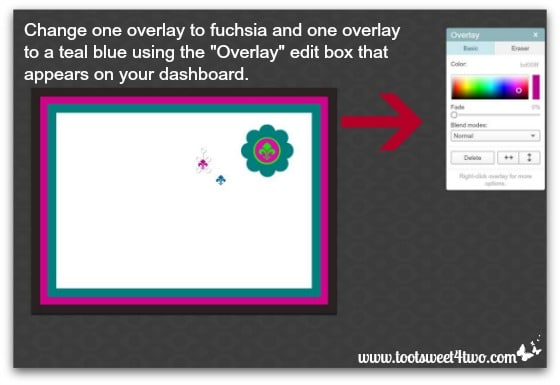
I changed one to fuchsia and the other to teal.
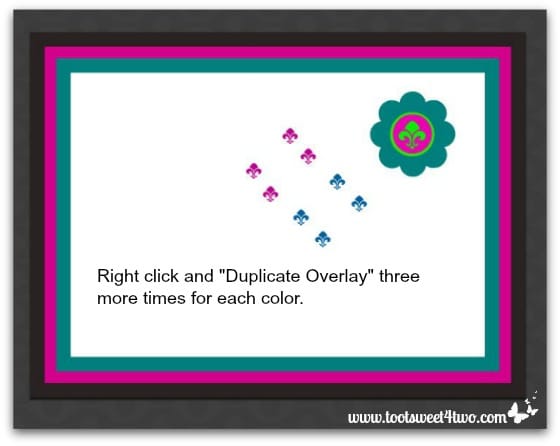
Then, I right-clicked and made 3 more duplicates of each color.
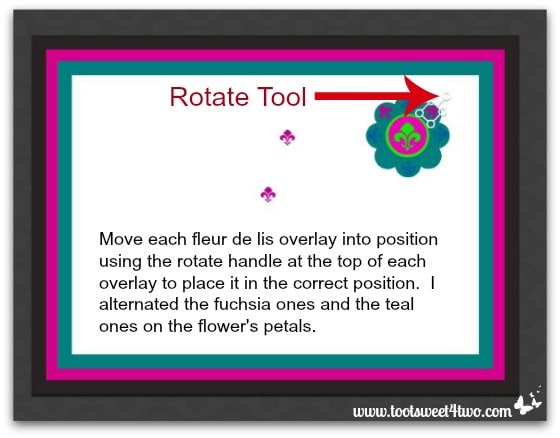
Then, I moved each overlay into position by clicking, holding and dragging AND using the rotating tool as needed. I alternated the fuchsia and teal overlays on every other flower petal.

Now I wanted some leaves. I chose a whimsical leafy pattern in “Garnishes”.

I duplicated it 3 times.
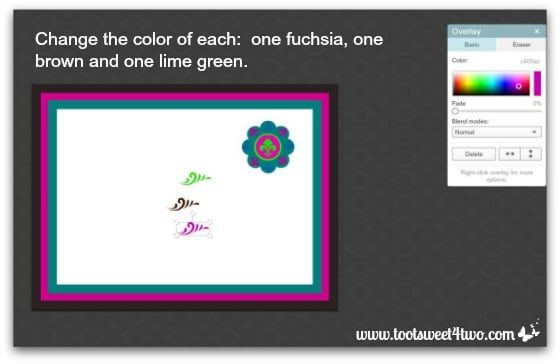
I changed one to lime green, one to chocolate and one to fuchsia.
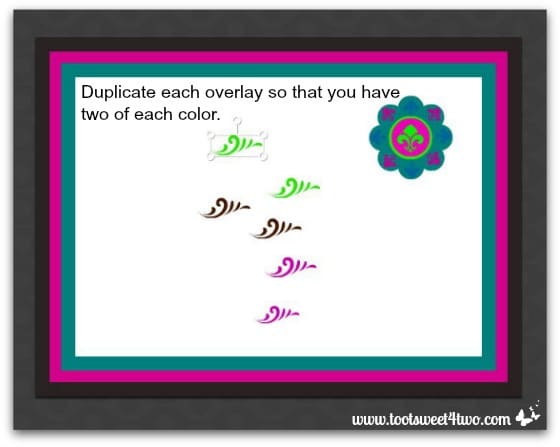
Then, I duplicated each color so that I had two of each.
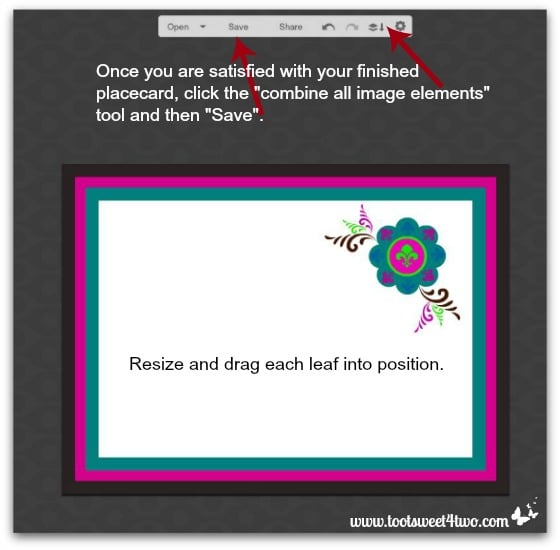
Next, I dragged them into position, resized them. Once I was satisfied with all my editing, I clicked on “combine all image elements” and then saved my new design to a folder on my desktop.
If you don’t have sparkly alphabet letters that you want to use on your placecard, you can add text to it and save each placecard with each different guest name in a folder on your desktop. For tutorials on text, check out these posts:
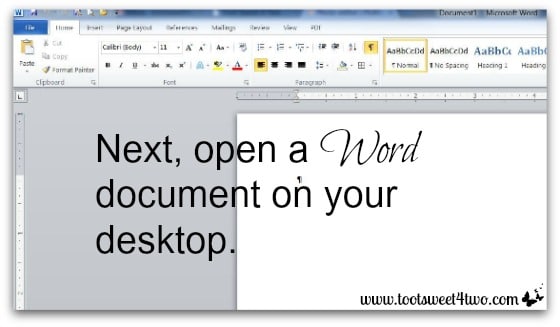
Next, open a “Word” document in Microsoft Office.
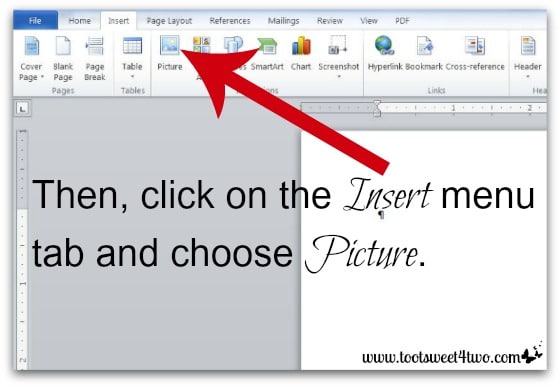
Then, click on the “Insert” menu tab and choose “Picture”.
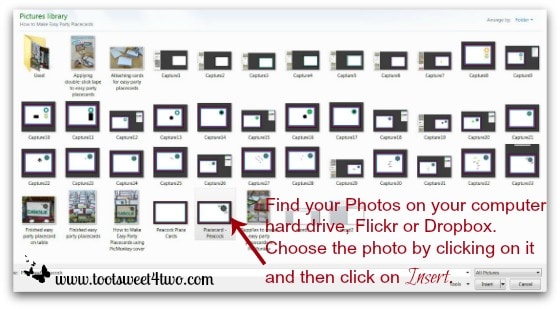
Find your folder, locate your placecard and choose the photo by clicking on it and then clicking on “Insert”.
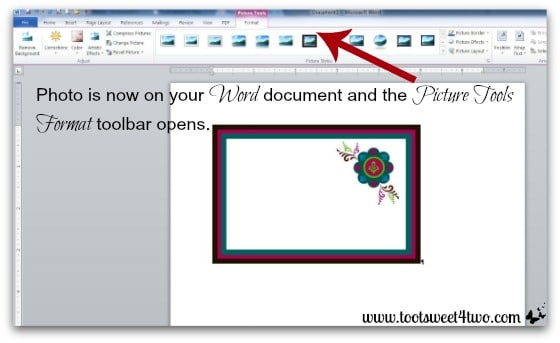
Your placecard is now on your “Word” document and the “Picture Tools – Format” toolbar opens. But, we don’t need that toolbar for this project.
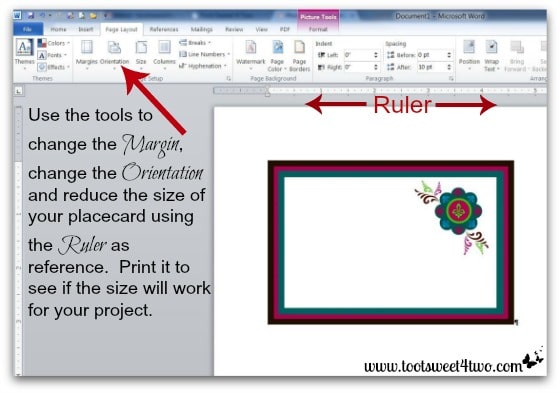
Use the tools in your “Page Layout” menu tab to change your paper’s “Margin”, the “Orientation” (can change from “Portrait” to “Landscape”) and reduce the size of your placecard using the “Ruler” as reference. Also, when you click on the placecard, sizing handles appear around the placecard allowing you to drag from one of the corners to increase or decrease its size.
Print a sample to check the size of your work before moving to the next step. For me, I found that “Portrait” worked best for this project.
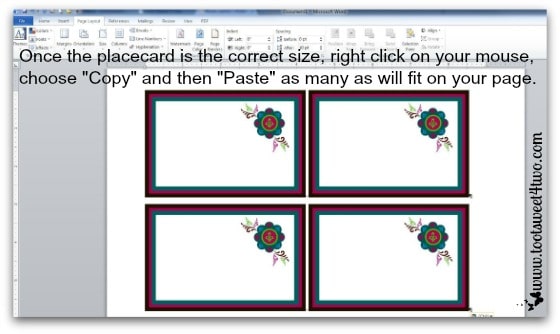
Once one placecard is the correct size, “Copy” and “Paste” more onto your page. For me, I was able to put a total of 6 on the page.
If you have made placecards with text, you will need to upload and resize each one onto your “Word” document before printing. Print as many copies as you need for your project.
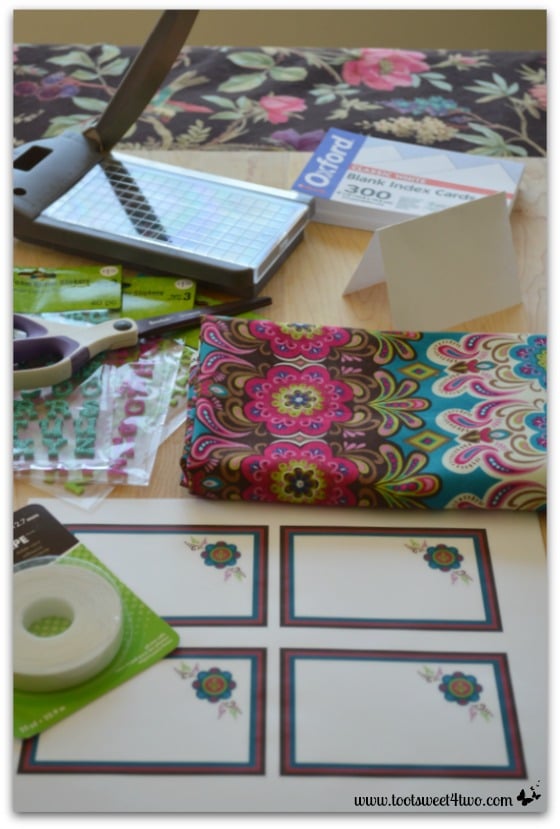
Next, gather the rest of your supplies:
- Scissors or a paper cutter
- Double-sided tape (I didn’t have “normal” double-sided tape, but had another product on hand that I used rather than going to the store and buying tape)
- 3″ x 5″ index cards or cardstock to make index cards
- Sparkly alphabet letters or other letters
This is what I did:
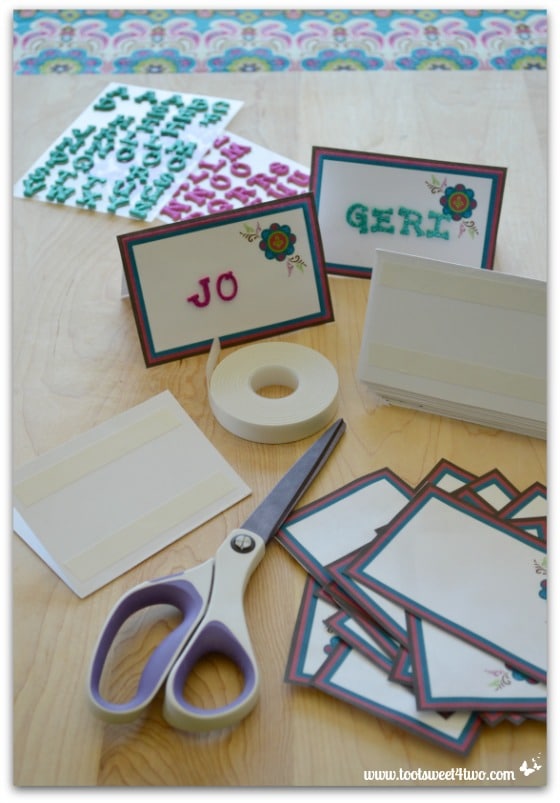
- I cut out each card
- I folded the index cards in half and added 2 strips of double-sided tape to each
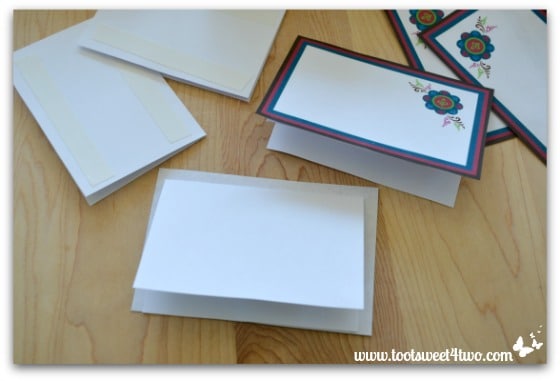
Then, I turned over the placecards so each was face-down and aligned the index card, sticky side down, over each placecard.
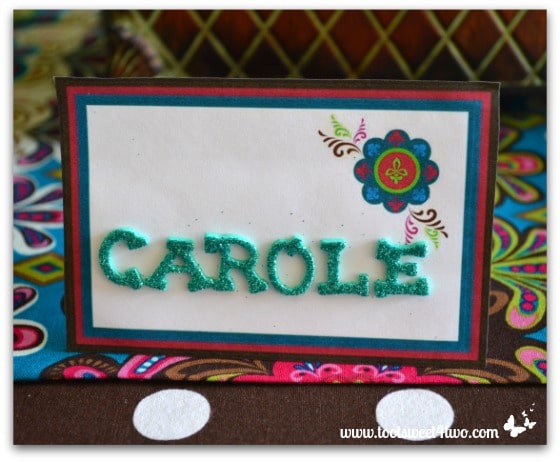
Then I spelled out everyone’s name in sparkly letters!
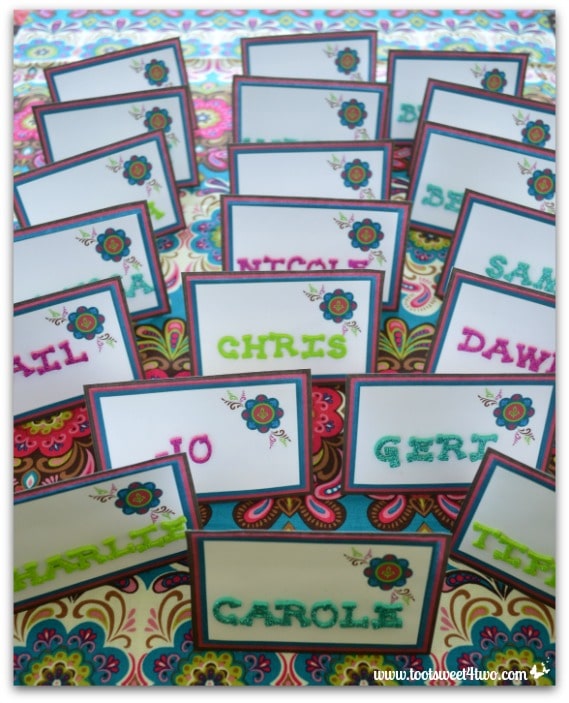
All done! Now you, too, know how to make easy party placecards using PicMonkey!

Here’s a blank card for you to save to your computer. This is a jpeg, so save it in your “Photos” so you can find it!

This is one with my flower design. Ditto above!
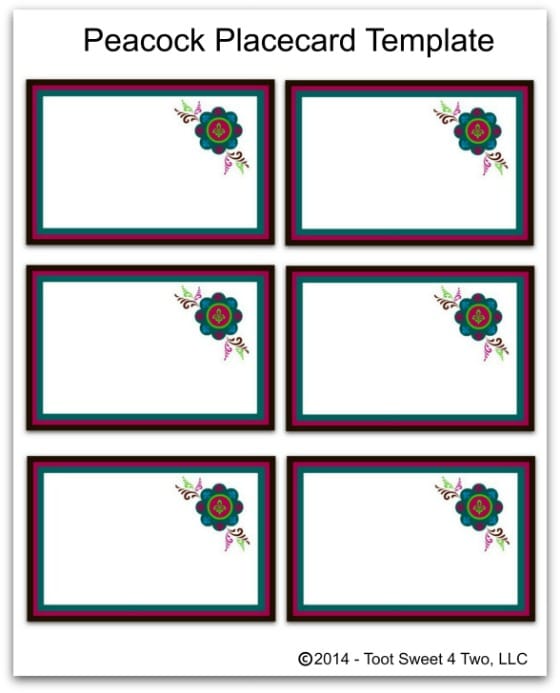
Or, you can save this jpeg and upload it to PicMonkey and resize it there. This may be of limited use because the width of my blog is 565 pixels and the width of this jpeg is 560 pixels. Increasing its size might make this pixelated! But, don’t despair…I’ve created a PDF for you to use!
Here’s your FREE printable placecard template: Peacock Party Placecard Template.
Tootles,

Related Posts:
(other party and tablescape posts)
I love Picmonkey! I use it mostly for photo editing but have gotten into more of the design stuff lately. It’s so fun, even if it does suck large chunks of my day away 😉
Isn’t that the truth – “does suck large chunks of my day away!” But, here’s what works for me: I do my photo editing in large chunks on PicMonkey, mostly on days when I’m not feeling “creative”. Then, those photos are ready for future posts, when I am feeling creative! I love PicMonkey, too. I learn something new every day! Thanks for dropping by, Trish! P.S. Love that “Joy” photo of yours!