Chapter Eighteen
“Emergency Planning Checklist” is part of the continuing story about the loss of our home in the San Diego Witch Fire in 2007. To read the earlier posts in the series, click on the links at the bottom of the post.
It has occurred to me that I have overloaded readers with so much information and a huge “to do” list as respects Emergency Preparedness and that starting such a project seems overwhelming.
It is.
And, it is not cheap. But, breaking it up into small chunks and committing to a schedule to reach specific goals, will ultimately result in the personal satisfaction that you are as prepared as you can be. So, the following are ideas to get you started on this project:
-
Calendar time with family members to discuss the project. Explain why it is important to you and get their “buy-in.” Bribery works.
-
Enlist help from family members, including children. Assign tasks with due dates. Bribery works.
-
Plan a time every week to discuss your on-going project. Make it dinner, make it fun, make it taco night. Bribery works.
-
When assigning projects to your children, point out that they can document the experience for a class project, school report or paper, or “show-and-tell”. Bribery works.
-
Practice drilling for emergencies. Buy a whistle (you should have one anyway) and at a pre-planning meeting, tell them at some point in the future, you will blow the whistle and that’s their cue to drop everything and follow the previously discussed emergency evacuation plan. Make it fun. Bribery works.
-
Enlist your neighbors. Make it a “community” project and parts of this large list of “to do’s” might be tackled quicker. Who knows? Maybe your neighbors have been thinking about this, but have just not taken the time to get started. Having a neighbor involved might keep motivation to finish it at a higher level, if you build in an “accountability” factor. Bribery works.
-
Ditto for extended family that don’t live with you, but near you. Bribery works.
-
Have a potluck brunch for girlfriends that you see infrequently, but would like to see more. Print the First Aid Kit Checklist and the Emergency Planning Project Checklist and hand them out. If the interest is high, create an email list and agree to email each other about deals found while shopping for products and supplies needed for this project at stores or on-line. Have quarterly potlucks to update each other on progress made on your projects or recruit help from each other and/or friends. Bribery works.
What’s with this “bribery works”? I just mean make them cookies! Cookies make everyone happy. Wouldn’t you do something for someone for homemade cookies? I know I’m being silly, but this is a huge project and the only way to tackle it with any degree of success is to enlist help. Sometimes help is hard to come by in our “toot sweet” lives, so use bribery!
The end result is that everybody wins – everybody wins because each person comes out just a little more prepared for life’s next emergency plus they get cookies!
In all seriousness, I’ve created an Emergency Planning Project Checklist, which you can print and use as your “jumping off point.” Every time you see the words Emergency Planning Project Checklist in this post, it’s a hyperlink that will take you to this checklist.
It’s a FREE printable 12-page guide that I have broken into separate projects to tackle one month at a time. So in a year’s time, you will have completed each section and prepared you and your family for emergencies and catastrophic events as much as you possibly can.
Please note the following:
-
This Emergency Planning Project Checklist is in no particular order. All of the 12 components are important and you and your family just pick one and start. Each family’s timeline is different and each family’s situation is different.
-
There is no right or wrong in emergency planning. Even if you do only one thing on this Emergency Planning Project Checklist, you are one-step closer to having some sort of emergency plan in place.
-
As I said above, there is no “order” in which to do these separate projects. Do one when it fits into your schedule. For example: if you are going on a vacation, when you return, do “Project #5 – Create Individual Kits for Family” because in that project, I suggest that you pack this stuff into a suitcase. You will already have suitcases out; just take out your vacation clothes and put in your emergency clothing. Another example: if your insurance policies (home and auto) are up for renewal soon, work on “Project #7 – Create a ‘Fly-Away’ Kit for Important Papers”. Since you will probably be reviewing your insurance policies, take the time and go one step further by gathering up all of your other important documents. And, another example: the next time you go to the grocery store, take the list from “Project #4 – Build Your Food Supply” and purchase a few items towards your emergency stash. Every time you go to the grocery store, buy a few more items on the list. Within a few months, you will have that project completed!
Here are pictures of some of the projects I’ve tackled on my Emergency Planning Project Checklist:
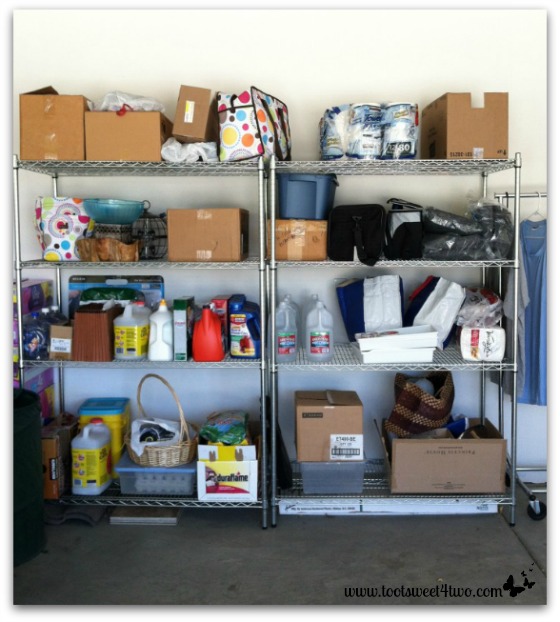
Garage shelving in chaos! I selected the shelving on the right (closest to the backdoor and right in front of where I park) as our “Emergency Preparedness” designed area and cleared EVERYTHING off of it. This is Project #2 – Clear Space in the Emergency Planning Project Checklist.
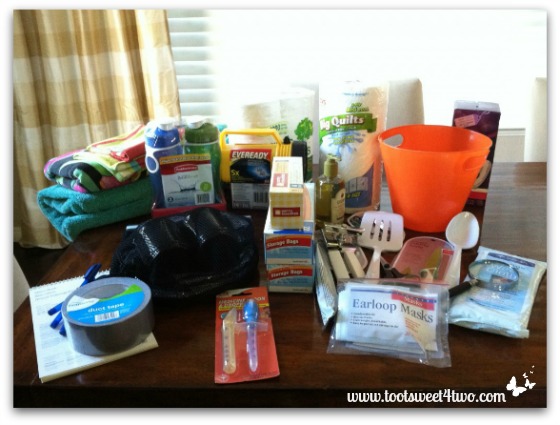
This is part of the items needed for Project #3 – Create a Basic Family Emergency Kit.
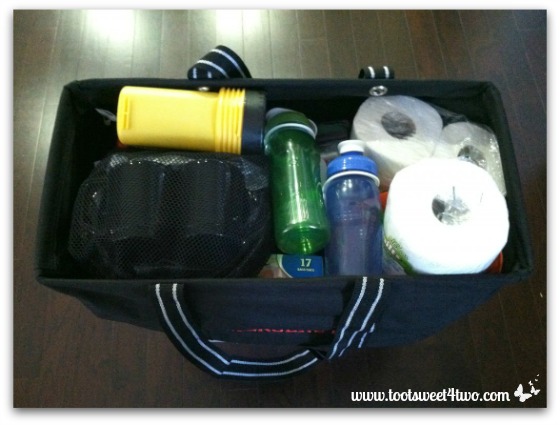
These are the items from Project #3 – Create your Basic Family Emergency Kit, packed in a bag for storage on the garage shelving.
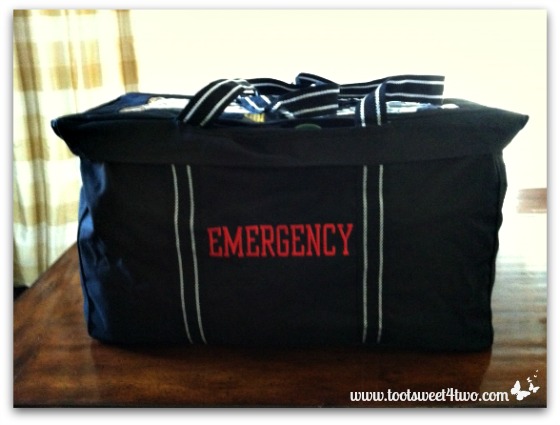
This is a front view of the same bag with the lid on. This bag is labeled Emergency in red. I purchased this bag from Tiffany when she was selling Thirty-One products (that’s the name of the company!) and had it embroidered by the company.
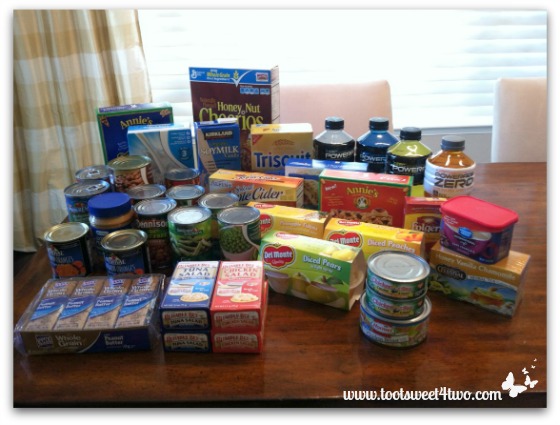
These are the food products I collected to complete Project #4 – Build Your Food Supply.
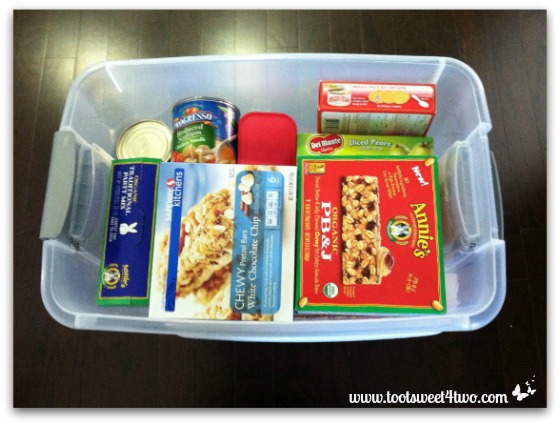
This is one plastic tote filled with non-perishable food supplies for our evacuation stash.
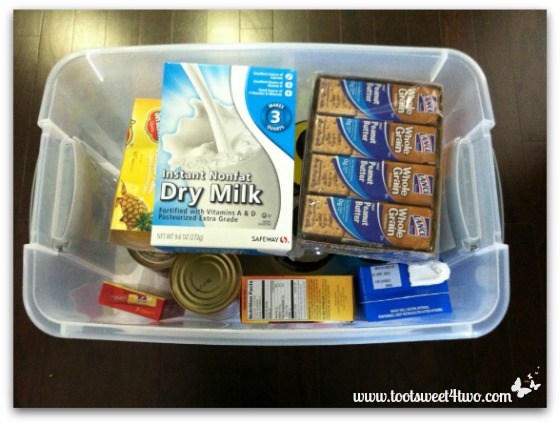
Here’s the second tote of food. You need a minimum of a 3-day supply per person. There’s just Charlie and me, so our stuff fit into 2 totes that measure 11″ x 18″ (or 30 quarts). Remember: you must be able to lift the totes into your car, plus they need to fit in your car!
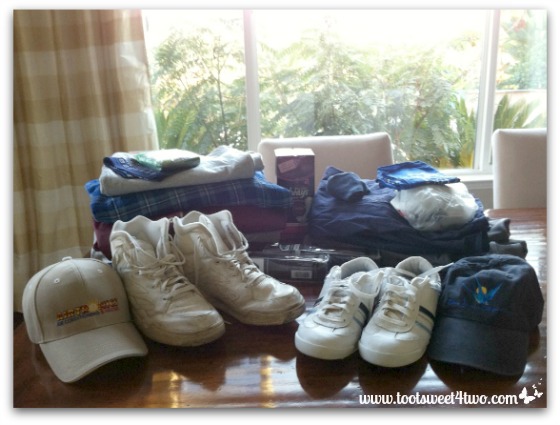
Here are our clothes that I’ve gathered together to complete Project #5 – Create Individual Kits for Family.
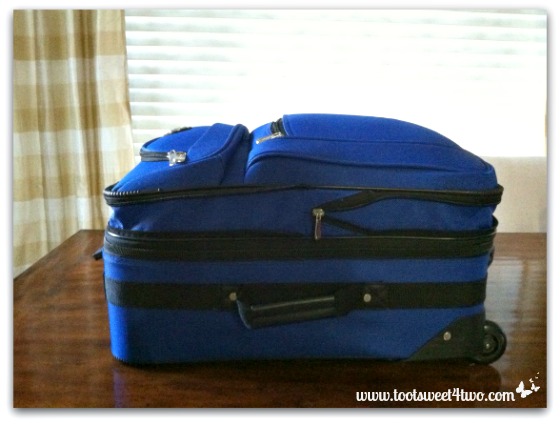
I packed both my clothes and Charlie’s clothes in this one suitcase and it took every inch of the suitcase to fit shoes and clothing in there! Please note that this suitcase is NOT waterproof. On our garage shelving, I have placed this suitcase inside a large garbage bag.
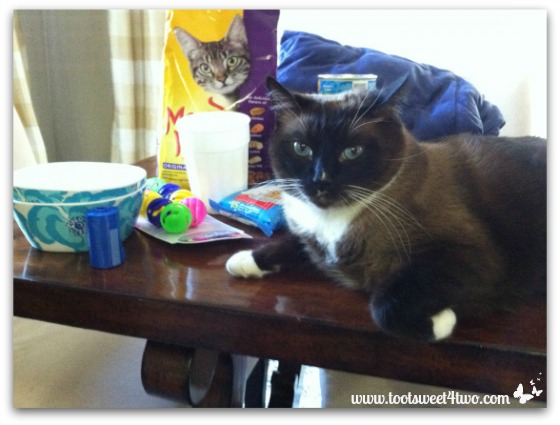
This is Coco helping me with Project #6 – Create a Kit for your Pet(s). Watch the cute video below – he’s a keeper!
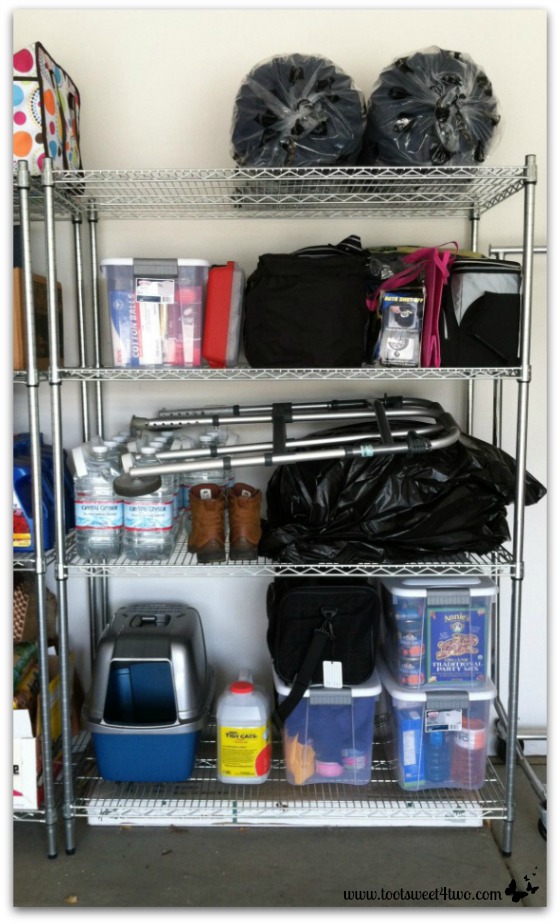
Here’s our revised designated Emergency Preparedness shelving in our garage.
Top shelf:
- Two sleeping bags
- Plus space to add more supplies as needed
Next shelf:
- First Aid Kit supplies
- Basic Family Emergency Kit (Project #3). Please note that this black bag is NOT waterproof and I have since put it in a large garbage bag, like the suitcase below it. Our garage is sprinklered – a building ordinance requirement when we built our new home – so should the sprinklers activate, everything will get wet!
- Behind it are three blankets in plastic bags plus a small insulated bag, just in case we need to keep some things cold (I have ice packs in the freezer located near by).
Third shelf from the top:
- 12 1-gallon water bottles (you need 1 gallon per day per person – there are 2 of us, so 6 gallons plus extra for Coco and extra just because)
- Our covered suitcase
- A pair of boots without rubber soles that I have
- Charlie’s walker
Bottom shelf:
- Clean cat box
- Cat litter
- Coco’s box
- Coco’s carrier
- Food supplies
There are lots of emergency planning resources on-line and available for free. Here are some to supplement my Emergency Planning Project Checklist:
-
Here is FEMA’s “Are You Ready?” guide
-
Here is FEMA’s “Family Emergency Plan” checklist
-
Here is one from the “Real Simple” site
Finally, if you do nothing else, do this: create a Family Emergency Evacuation Plan and review it with all family members. Here’s mine:
Our Family Emergency Evacuation Plan
-
Get Coco’s carrier from the garage and get Coco. Place him securely in the carrier and put him in the car.
-
Pack Charlie’s wheelchair in the trunk of the car.
-
Load Charlie’s scooter on the back of the truck.
-
Turn cars around and back into place, facing the direction to head out of the driveway.
-
Shut vehicle doors and windows, but leave keys in the ignition.
-
Pack the car with all of the emergency supplies already in the garage on the shelf dedicated to emergency supplies.
-
Get Charlie in his truck.
-
Leave; call family and tell them you are leaving and where you are going.
If time permits:
-
Go around house and choose other items to take and load those into the cars (if space permits).
-
Move vehicles out of garage and close garage doors.
-
Close all entrances to the house (windows, doors, vents, etc.).
-
Turn off gas water heaters.
-
Turn off gas fireplaces.
-
Turn off propane tanks at the meter.
-
Move furniture away from the windows.
-
Close all window coverings.
-
Turn on a light in each room to increase visibility of our home through heavy smoke.
-
Lock doors.
Here’s a super cute video of Coco helping me with his portion (Project #6 – Create a Kit for your Pet) of the Emergency Planning Project Checklist. Take a look:
http://youtu.be/HCxvX0g6_p4
http://youtu.be/pyuoPOFjfBI
Do you have an idea about how to tackle this giant project? I’d like to hear, so please share.
Tootles,
Related Posts:
(other posts in the fire series)
- Prologue – Any Way the Wind Blows
- Chapter One – The Valley That Time Forgot
- Chapter Two – Eye of the Storm
- Chapter Three – In the Blink of an Eye
- Chapter Three.One – Too Far From Home (Tiffany’s story)
- Chapter Four – Between a Rock and a Hard Place
- Chapter Five – In a Blue Funk
- Chapter Six – Back to Square One
- Chapter Seven – One Step Forward, Two Steps Back
- Chapter Eight – Not Me, Why Me, Who Me, It’s Me
- Chapter Nine – The Whole Kit and Caboodle
- Chapter Ten – Feathering the Nest
- Chapter Eleven – The Blind Leading the Blind
- Chapter Twelve – Apple Pie Order
- Chapter Thirteen – All Hands on Deck!
- Chapter Fourteen – In the Lap of Luxury
- Chapter Fifteen – Much of Muchness
- Chapter Sixteen – The Backup Plan
- Chapter Seventeen – What’s in Your First Aid Kit

Great visual post! Love it. Thank you for such a great information.
You’re very welcome! Thanks for stopping by!