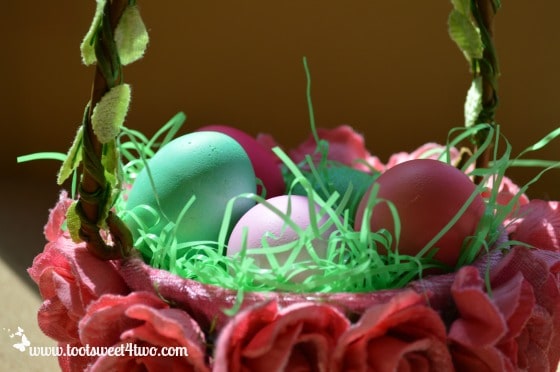
Pretty dyed Easter eggs in a rose basket
Inspired by Tiffany’s recent post, Disneyland on a Dime, I decided to name this post Dyeing Easter Eggs on a Dime! You can dye Easter eggs at no additional cost if you already have a few ingredients on hand. Since I have several boxes of gel food coloring in my pantry from cakes, cupcakes and cookie decorating, I decided to give it a whirl. Plus, I already had distilled white vinegar in my pantry, so I was set.
But, those Easter Egg dyeing kits come with little cups and a handle to lift the eggs out of the cups and I didn’t saved them from past egg dyeing jobs. What to do? What to use? A quick tour around my kitchen and I found all that I needed in the way of supplies: glass dishes of all sizes and pink plastic spoons leftover from a recent Princess Party. I was set!
So, to recap, here’s a materials and supplies list needed for this project:
Materials Needed
- Hard-boiled Eggs
- Distilled Vinegar
- Gel Food Coloring
Supplies Needed
- Glass containers of various sizes (a quick search on the internet suggested that you NOT use porcelain cups; the dye can embed in the porcelain and leave a permanent stain)
- Plastic spoons
- Baking tray
- Empty egg carton
Here’s what you do:
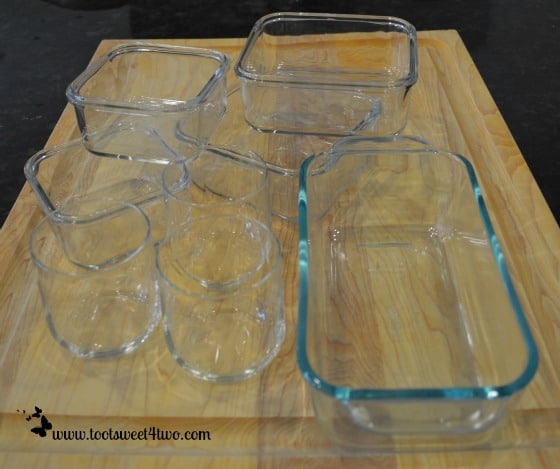
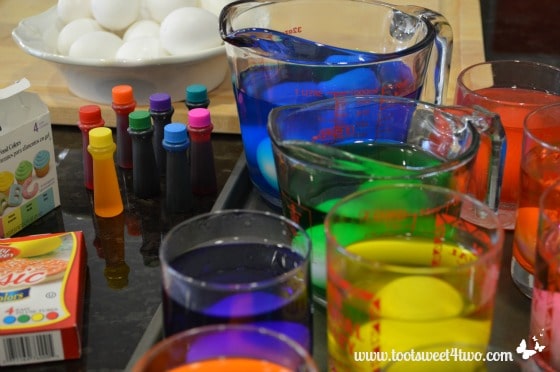
Gather glass containers of various sizes.
I got these out and then decided maybe that wasn’t enough! So, I got out more…
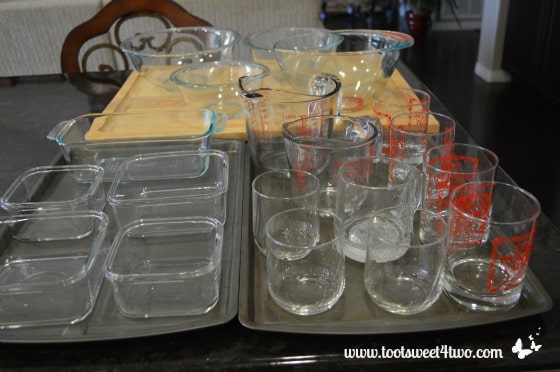
More glass containers!
They need to be deep enough so that your eggs will be fully submerged. I decided that the square glass dishes on the left might not work, so ended up using only the glasses on the right. Note that I’ve placed the glasses on an aluminum baking tray. This is to protect the surface area of your countertop plus provide easy clean-up. So, after hauling all of these out of my cupboards, I put many of them back!
Next, get out your kettle. I have an Oster Electric Kettle that I love. Fill it, plug it in and in less than 3 minutes, hot water! Whatever you use, you need to have hot boiling water to mix with the gel food coloring.
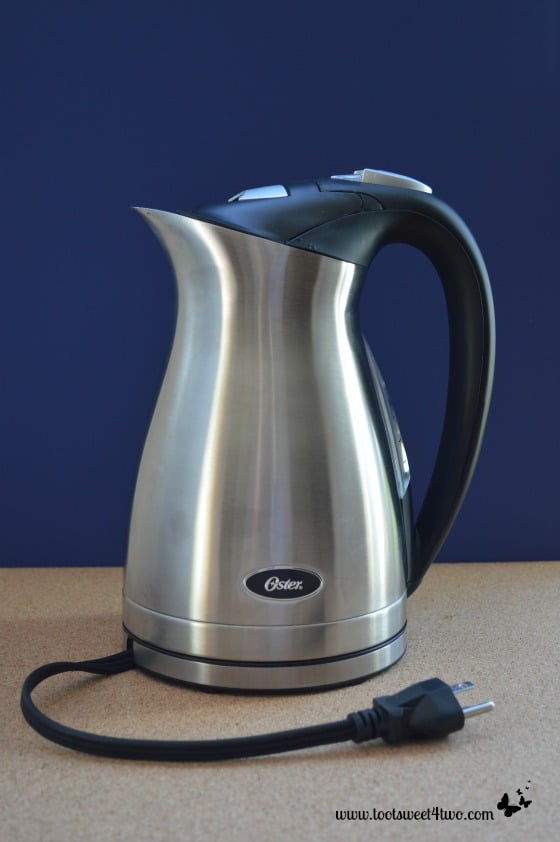
Oster Electric Kettle
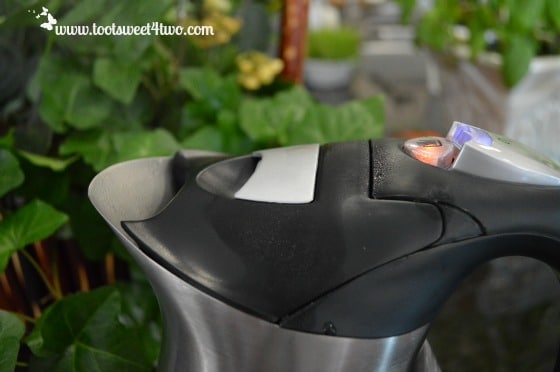
My kettle with boiling water in less than 3 minutes!
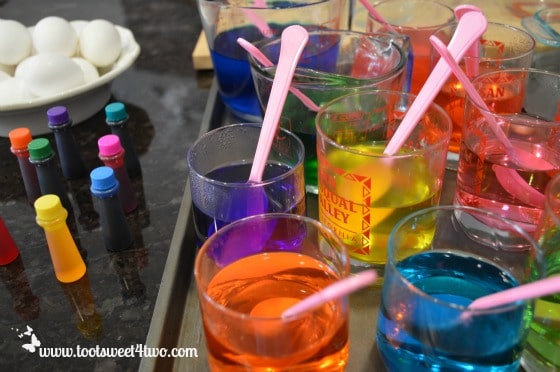
Prepare the dye bath.
Pour boiling water into each glass container. You will need to fill each container with enough water to cover the eggs. I ended up boiling two Oster Electric Kettles of water to fill these glasses. Next, add 1 teaspoon of distilled white vinegar to each glass. You will need 1 teaspoon of distilled white vinegar for each 1/2 cup of boiling water.
Then, add the gel food coloring one drop at a time until you have the desired shade. Stir with plastic spoon to mix thoroughly. I used a separate plastic spoon for each container so as not to cross-contaminate the colors and ruin my dye batches.
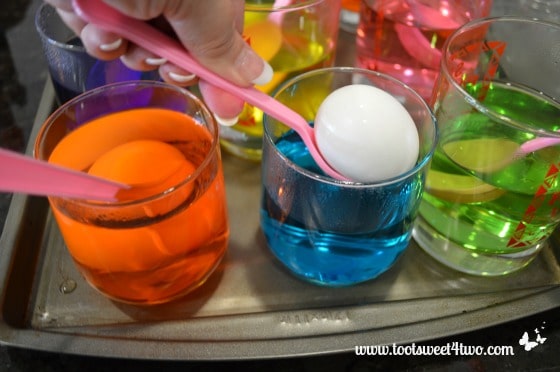
Carefully lower a hard-boiled egg into each dye bath.
All glass containers full of eggs!
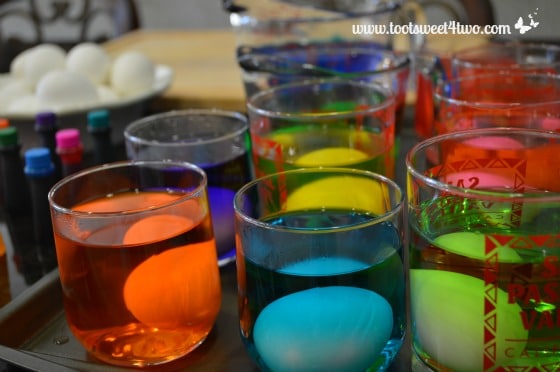
It takes 5 minutes to dye an egg. However, if you want richer, deeper colors, you will need to let them sit in the dye longer. I dyed my eggs for a total of 15 minutes each. If you want to dye them any longer, you will need to refrigerate them, dye and all. This is when the tray comes in handy – just put the entire tray of eggs in your refrigerator and check them in another 15 minutes.
Eggs in dye bath.
To check the color, insert your plastic spoon in the cup and carefully lift the egg to inspect. If not to your liking, place back into dye bath.
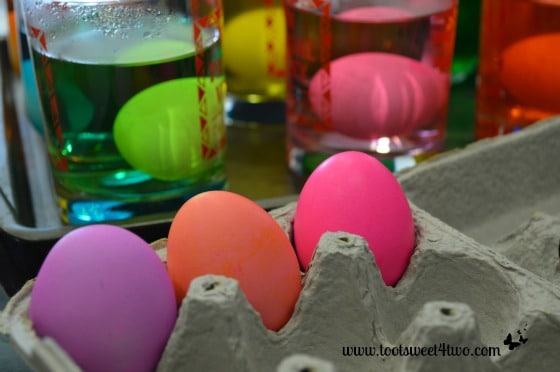
The first Easter eggs out of the dye bath!
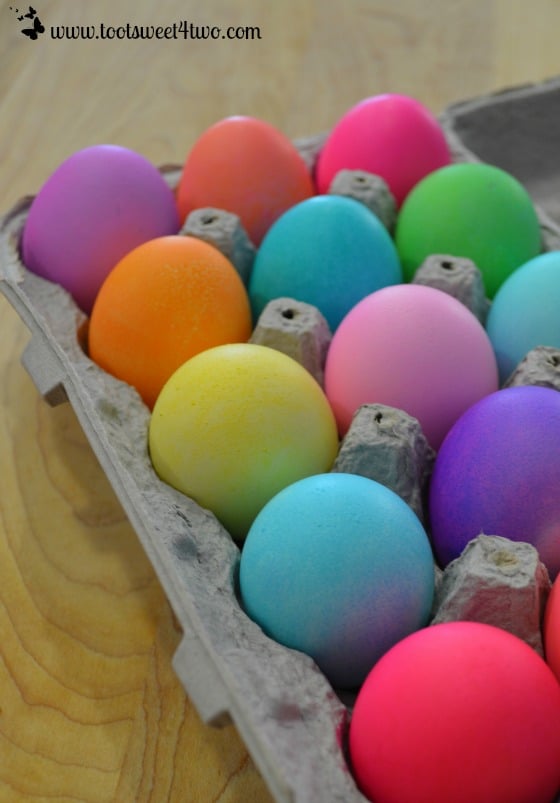
A dozen beautifully dyed Easter eggs!
I know this isn’t a recipe, but I decided to put it on a recipe card so that you can print it, if you want to. So, here’s the “recipe”:
- A dozen or more eggs, hard-boiled
- Distilled white vinegar
- Gel food coloring
- Boiling water
- Egg carton (reserved from eggs)
- Glass containers large enough to hold an egg
- Plastic spoons
- Aluminum baking tray
- Set up your dyeing area: place aluminum tray on your counter and add glasses.
- Boil water.
- Pour boiling water into each glass.
- Add 1 teaspoon of distilled white vinegar for each 1/2 cup of boiling water.
- Add gel food coloring, one drop at a time, to each glass container.
- Stir to mix until dissolved.
- Carefully lower egg into prepared dye bath using a plastic spoon.
- Let egg sit in dye bath until desired color is reached.
- Carefully remove eggs from dye bath with plastic spoon and place in saved egg carton to dry and store.
Tootles,

P.S. Don’t have an electric kettle but want to get one? Need glass storage containers or bowls or measuring cups? Need baking (cookie) sheets? We have a solution for you! Visit our Amazon store at Shop Toot Sweet and check out all of these items and more available under Kitchen and Housewares!
Disclosure: If you decide to make a purchase through our link, Amazon will pay us a commission for it. This does not cost you anything more. These commissions help to keep the rest of our content free, so we thank you very much!
Leave a Reply