Now that I’ve rounded up potential surface back-drops, it’s time to move to the third idea of the 3 Cheap and Easy Ideas for Better Food Photography:
Cheap and Easy Idea #3 – Foam Core Board – Cost about $6.00 per board
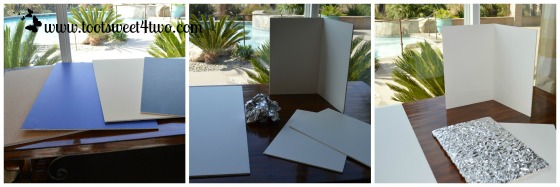
Here’s my selection from left to right in the left photo above: cork, dark blue, gold matte, black. In the middle and right photos are white foam core boards. Kelly’s suggestion is that you buy a white one and cut it into 4ths. Tape 2 of the quartered pieces at a 90 degree angle to create a “fill card” that will stand up. Her next suggestion is to cover one of the quarters with crumpled aluminum foil (that’s a ball of crumpled foil in the center picture). And for the fourth quartered foam core board, Kelly suggests that you cover that with a gold paper, such as a gold foil wrap. Well, I haven’t bought that yet, so my remaining piece is waiting to find its cover!
Using my newly purchased items, it was time to experiment with set-ups.
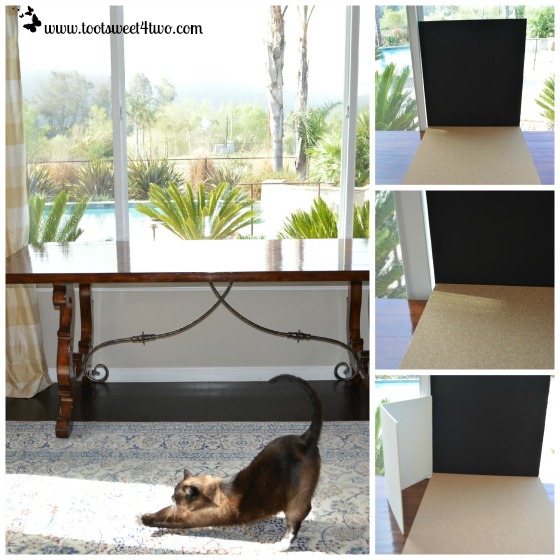
In the big picture above, I moved my kitchen table directly against my kitchen window. Coco decided to help and found a patch of sunlight to stretch out his kitty kinks!
In the top right photo, I placed the black foam core board into the window ledge and the cork foam core board on top of the table and pushed up to the black foam core board. In the middle picture on the right, you can see a stream of sunlight across the cork board. In the bottom picture on the right, you can see the white board fill card standing to block that stream of light.
Time to shoot my first photo set-up.
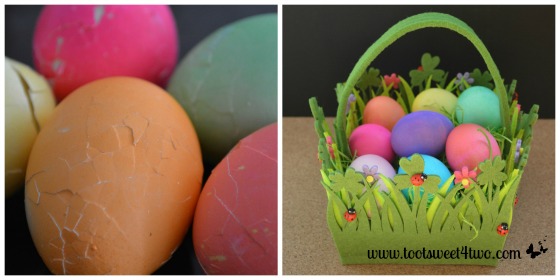
This is where my first disaster happened with my new photography “studio” set-up! The beautifully dyed Easter eggs were on my kitchen counter. I got out this darling felt Easter basket that I bought at the grocery store and filled it with Easter grass. Then I carefully placed the best dyed eggs in it and lifted it by the handle to carry to my photo studio. Silly, stupid me! The felt basket couldn’t support the weight of 8 hard-boiled eggs and they cascaded over the burgeoning sides of the basket crashing to the floor and splintering into the cracked eggs on the left!
Fortunately, I had more Easter eggs (I dyed 36 in all), so after learning this lesson (and I should have known better!), I placed this felt basket into position in the “studio” and carried the uncracked eggs to the table in a bowl! Then, I snapped the picture on the right after setting the fill card in a place to avoid shadows.
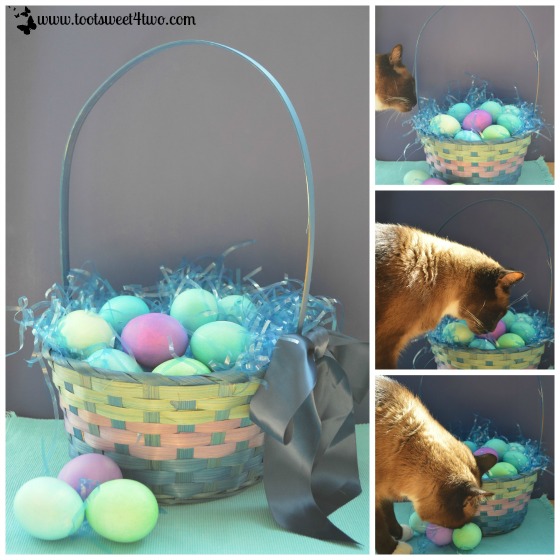
Then, I went about setting up my next shot. Guess what? My PA (personal assistant) aka Coco appeared on the scene to check things out. He has a habit of doing that and you can see him “helping” in other posts (here are some links: Making a Grocery List Clipboard with My Personal Assistant, Emergency Planning Checklist (has a Coco video), and Easy Shamrocks and Leprechaun Centerpiece).
You can tell by the big picture on the left that the light is saturating (and washing out) this photo. Why didn’t I use the fill cards? Well, they were too small! The handle of this Easter basket stretched up beyond the height of the fill card! Time to make fill cards of various sizes!
Then I decided to experiment with another subject matter – one that Coco was used to and unlikely to photobomb!
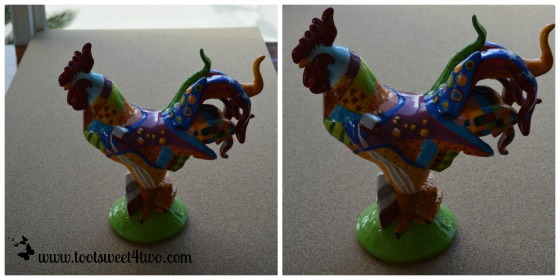
I placed this ceramic rooster at the very end of the cork foam core board with the hope that I wouldn’t have to use a back drop (because I could crop out the window in the background). This photo was taken in natural (cloudy) daylight in front of a window. Even so, the subject (the rooster) is dark. And, even though I did crop out the window in the photo on the right, the crop is too close around the rooster resulting in an unappealing picture.
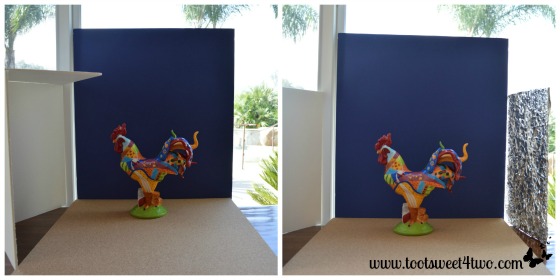
Then, I placed the dark blue background behind the rooster, moved the rooster closer to the background and added the fill card on the left. Doing this still made the subject (rooster) dark and left a long rooster shadow on the left. Adding the foil fill card on the right, bounced the light back onto the subject (rooster), lightening him and lightening the blue background.
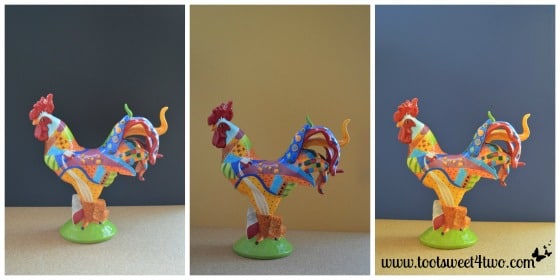
Here’s the rooster with 3 different backgrounds. Which one do you like best? BTW – the rooster was a gift from my sister, Dawn! Thanks, Dawn!
Moving on, I chose a different subject.
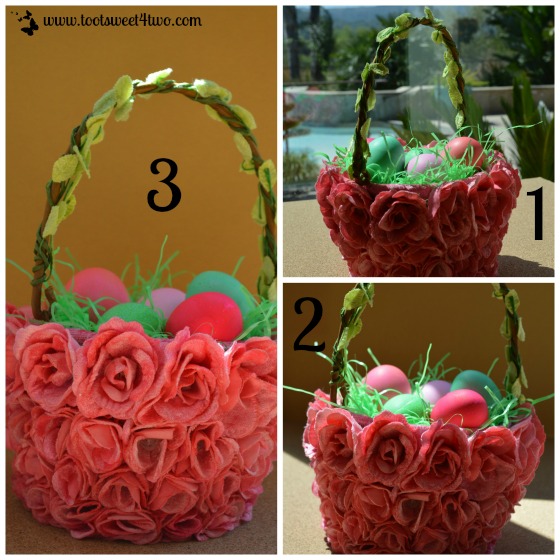
I needed a “cover” shot for my Dyeing Easter Eggs on a Dime post. So, I thought this rose basket, a gift from my aunt many years ago, would be pretty. Picture #1 is on the table in front of the window with no back drop, just the out-of-doors beyond. It’s over saturated and has too many shadows. Picture #2 has the golden foam core board added as a back drop, but the light streaming through the window around the board is a problem. Picture #3 has the fill card placed to the left, but is slightly out-of-focus. You will have to visit my post, Dyeing Easter Eggs on a Dime, to see which final shot I used!
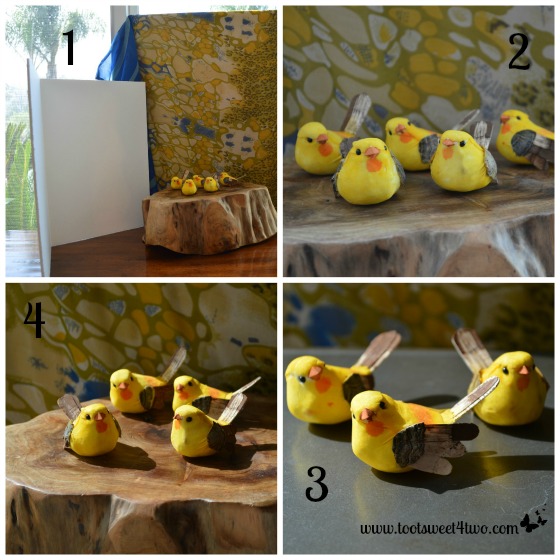
This is my last experiment for this post (I promise!). In Kelly’s book, she mentions that she also uses clothing as back drops. What a great idea! I rummaged through my closet to see if I had any clothing that would look good with these very cute, tiny, yellow mushroom birds. I found this top, but it was sheer. So, I inserted the golden foam core board under it (I didn’t even take off the hanger!) and in Picture #1, placed the foam core board, shirt and all, in the window. I placed the birds on the upside down wooden bowl from my sister, added the fill card and snapped Picture #2.
By this time, the cloud cover had blown through again and the resulting Picture (#2) wasn’t so pleasing. So, I moved the foam core board with the shirt to a chair, propping it against the back of the chair, moved the chair right up to a different window, placed the birds on an upside down cookie sheet (Picture #3) and then back on the upside down wooden bowl (Picture #4). Light wise, both pictures are better, but Picture #4 is slightly out-of-focus.
So, you can see that creating the fabulous pictures you find on Pinterest is a lot of work and requires special skill. A shout-out to all the great photographers out there! Awesome job! Keep up the good work and keep inspiring us to get better and better in our own quest to improve our photography skills. And, a shout-out to Kelly Senyei – thanks for the great book! I’m going to keep working on this and rereading your book and practice, practice, practice!
Remember I mentioned at the beginning of this post that I would explain the reason for NOT reshooting the photos in recipe posts in the queue that have yet to be published? Drum roll…just shooting the pictures for this post took 45 minutes. That 45 minutes included set-up, photographing each set-up, take-down and putting items away. Once that was done, it took me another 2 hours to download the photos to my computer, choose the ones to use, create the collages in PicMonkey including inserting our Toot Sweet 4 Two name on each. Then, it took me another 4 hours to write this post, insert the pictures, proof-read, edit and set it up to publish!
So, you can see that much goes in to creating, writing, and publishing a post. If I go back and re-do photos for recipes already in our posting schedule, I probably wouldn’t have time to create new content for this blog! Finally, showing our progression as a blog from infancy forward has value to us because we are proud of where we started, proud of how far we’ve come and proud about where we are going!
Tootles,
P.S. Do you need foam core board for photography or a craft project or school project? Visit our Amazon store at Shop Toot Sweet and click under the Photography link! Oh, and Kelly’s book is in there, too, along with other books on the art of blogging.
Disclosure: If you decide to make a purchase through our link, Amazon will pay us a commission for it. This does not cost you anything more. These commissions help to keep the rest of our content free, so we thank you very much!

Thanks so much for your kind words about my book and recommending it to your readers! I’m thrilled to have found your blog and look forward to exploring more!
You’re welcome, Kelly. It was much deserved! Your book is excellent and while I read it cover-to-cover, I still learn (re-learn) from it all the time. A very valuable resource to us as we progress through this blog journey! Thanks so much for your comment! I means a lot to us, to me, that you’ve visited our site!
I loved reading this. You are “welcome” for the rooster.. I learned so much from this blog. I can’t believe you cracked those beautiful eggs. What were you thinking? well I mean, I guess you weren’t thinking at this point, haha. Your pictures were great. My vote on the three rooster ones was the one on the right, I liked the lighter blue with the colors in the rooster. PS, your assistant is adorable.
As respects the cracked eggs, I think I just had my head in the clouds – excited about creating a shot with my new “studio” layout! Just a space cadet!